

How to set up Heiman Home in Home Assistant (Complete Guide)
We know many of you have been using our Sub-1GHz (SubG) devices and Gateways (the ones often found on Amazon). We've been working hard on an official Cloud Integration to bring these devices into Home Assistant so you can finally get those alerts and sensor states directly in your dashboards.
Why SubG wireless?
- Extended Whole-Home Coverage: High-penetration radio waves easily reach across multiple floors, providing reliable connectivity even in a 3-story building.
- Seamless Native Interconnection: Built-in support allows your Smoke, CO, and Heat alarms to talk to each other instantly—if one alarm sounds, they all sound. No hub required for local interconnection.
- Ultra-Reliable Connectivity: Unlike Wi-Fi, Sub-GHz operates on a less congested frequency band, providing reliable long-range communication with reduced interference. Local alarm communication remains active even during an internet outage.
How to set up Heiman Home in Home Assistant
Important note: The Heiman Home integration is installed via HACS (Home Assistant Community Store). You'll need to have HACS already set up on your Home Assistant instance before starting.
Step 1: Open HACS
- Open your Home Assistant web interface and log in with your credentials
- On the left sidebar, click HACS
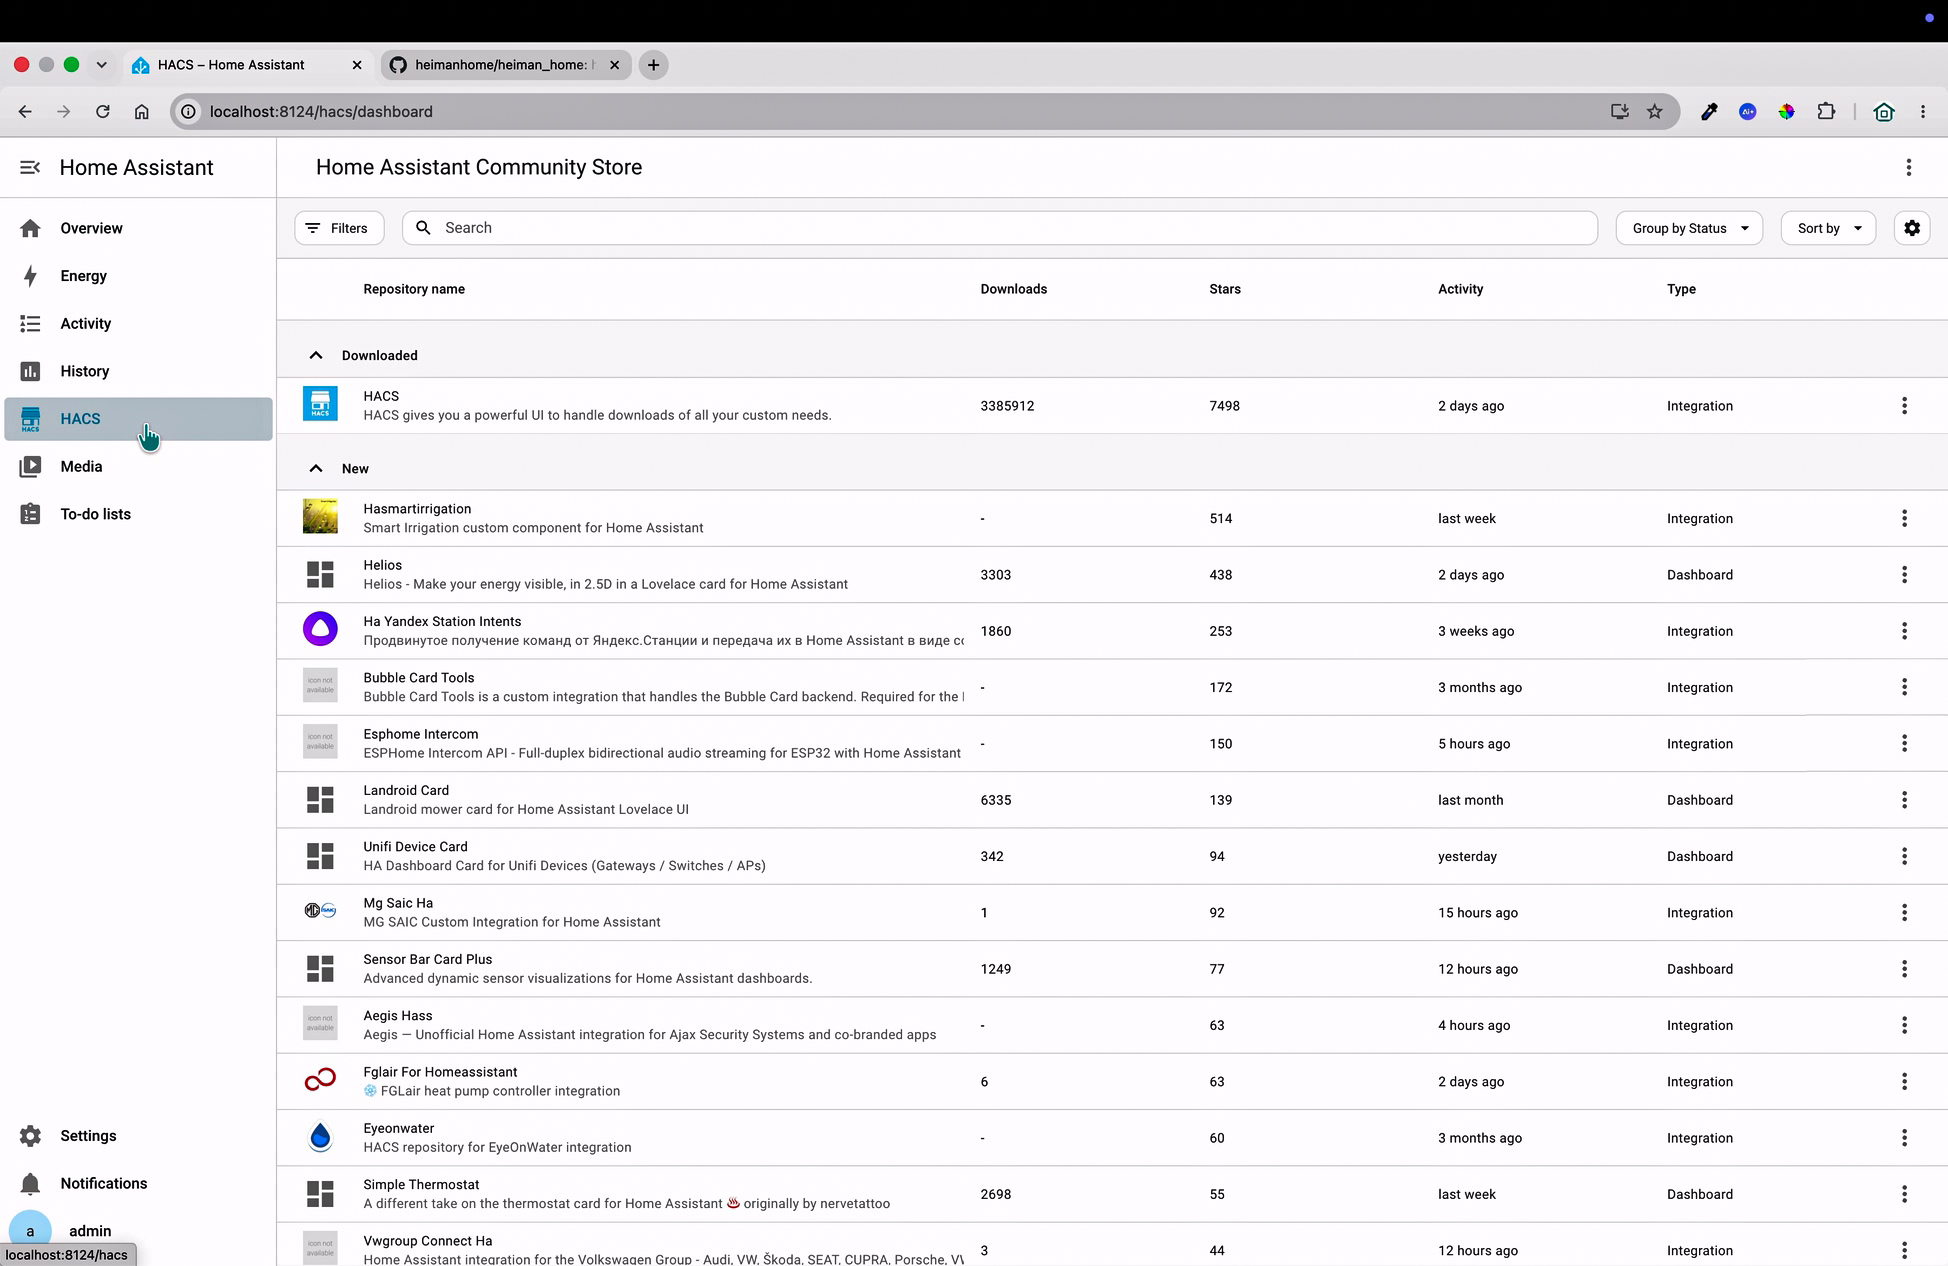
Step 2: Add the Heiman Home custom repository
- Click the three-dot menu (⋮) in the top-right corner
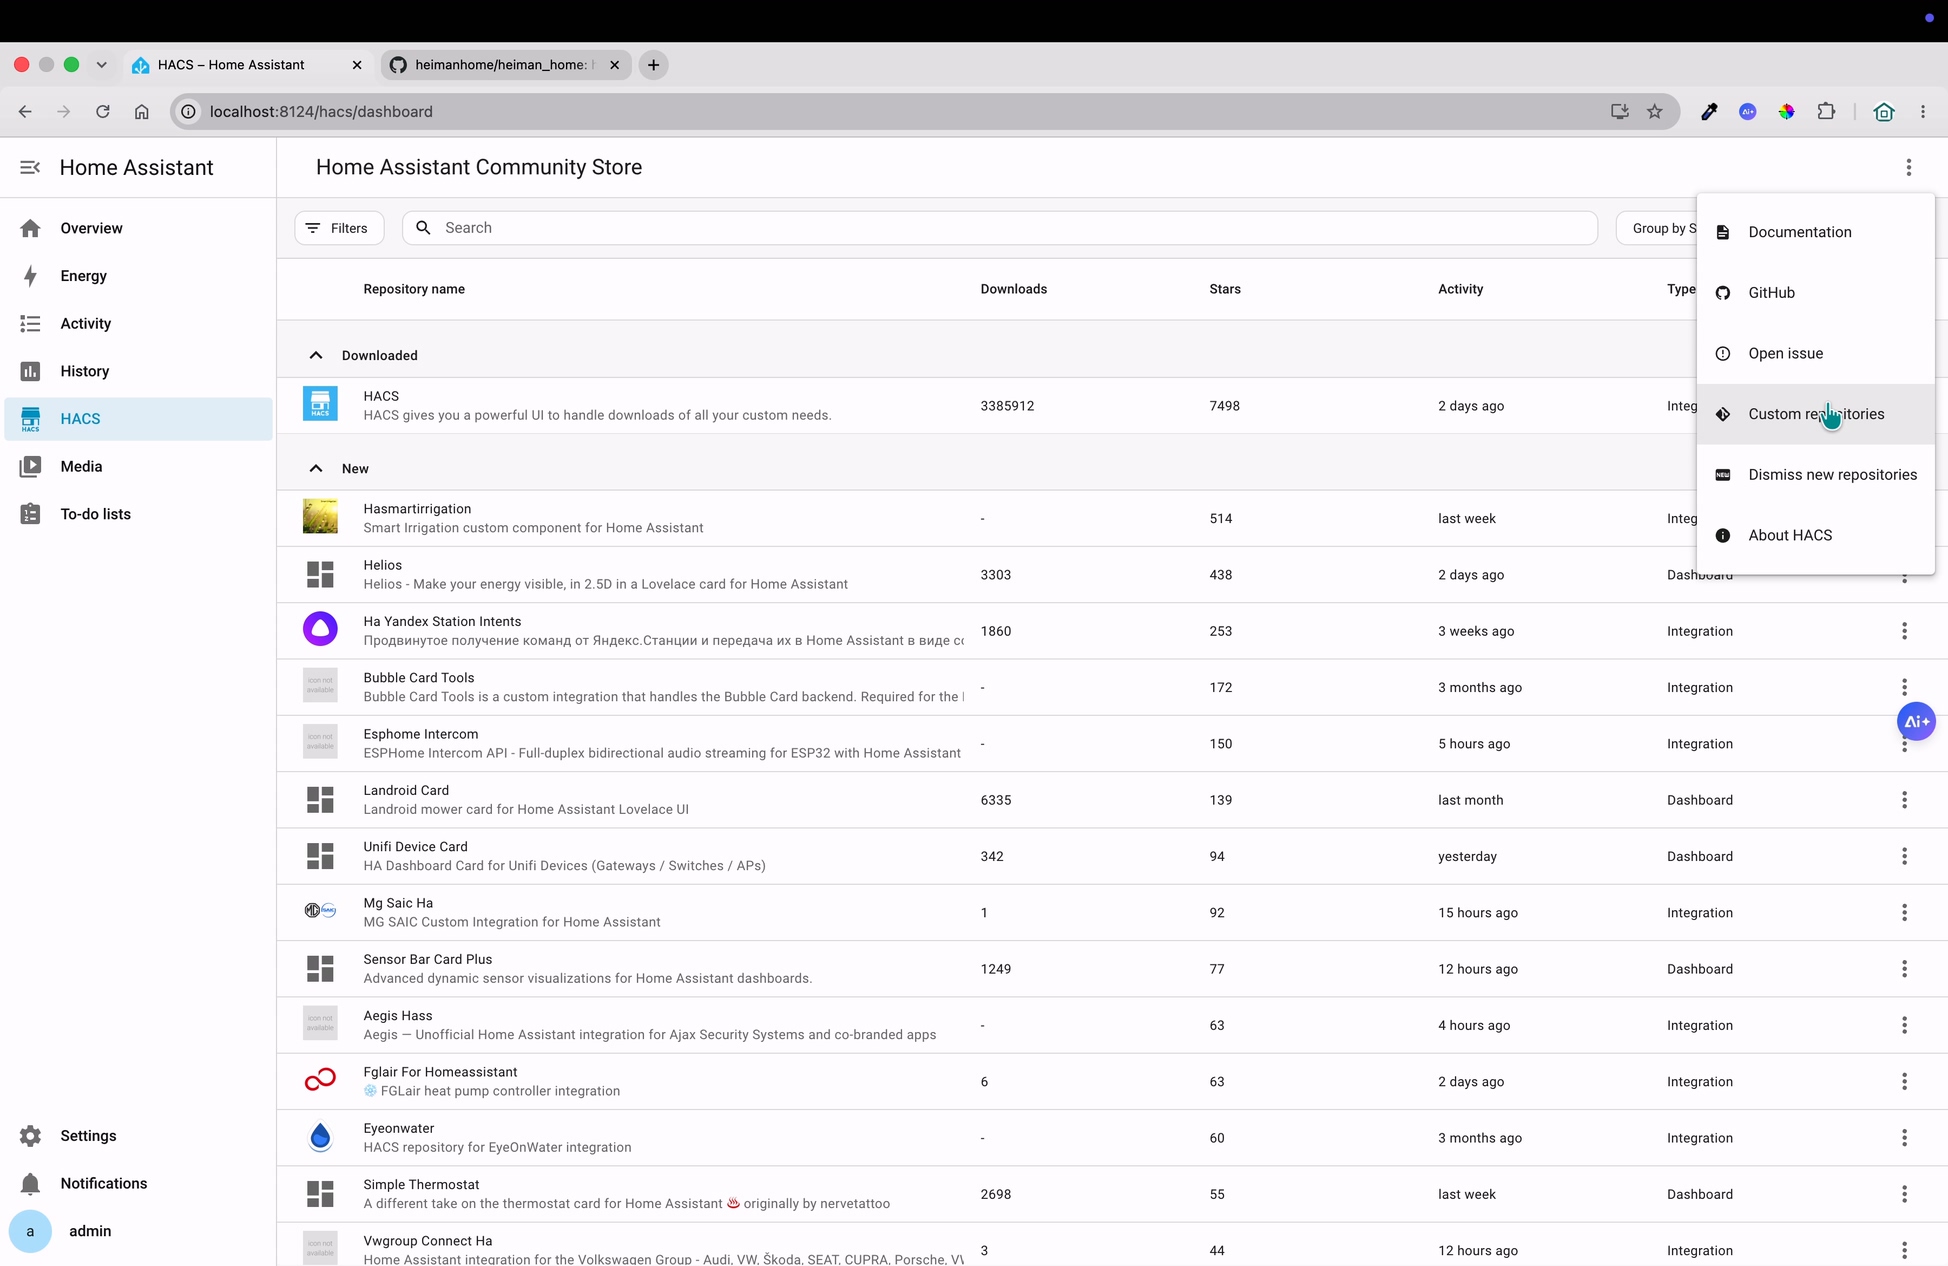
- Select Custom repositories
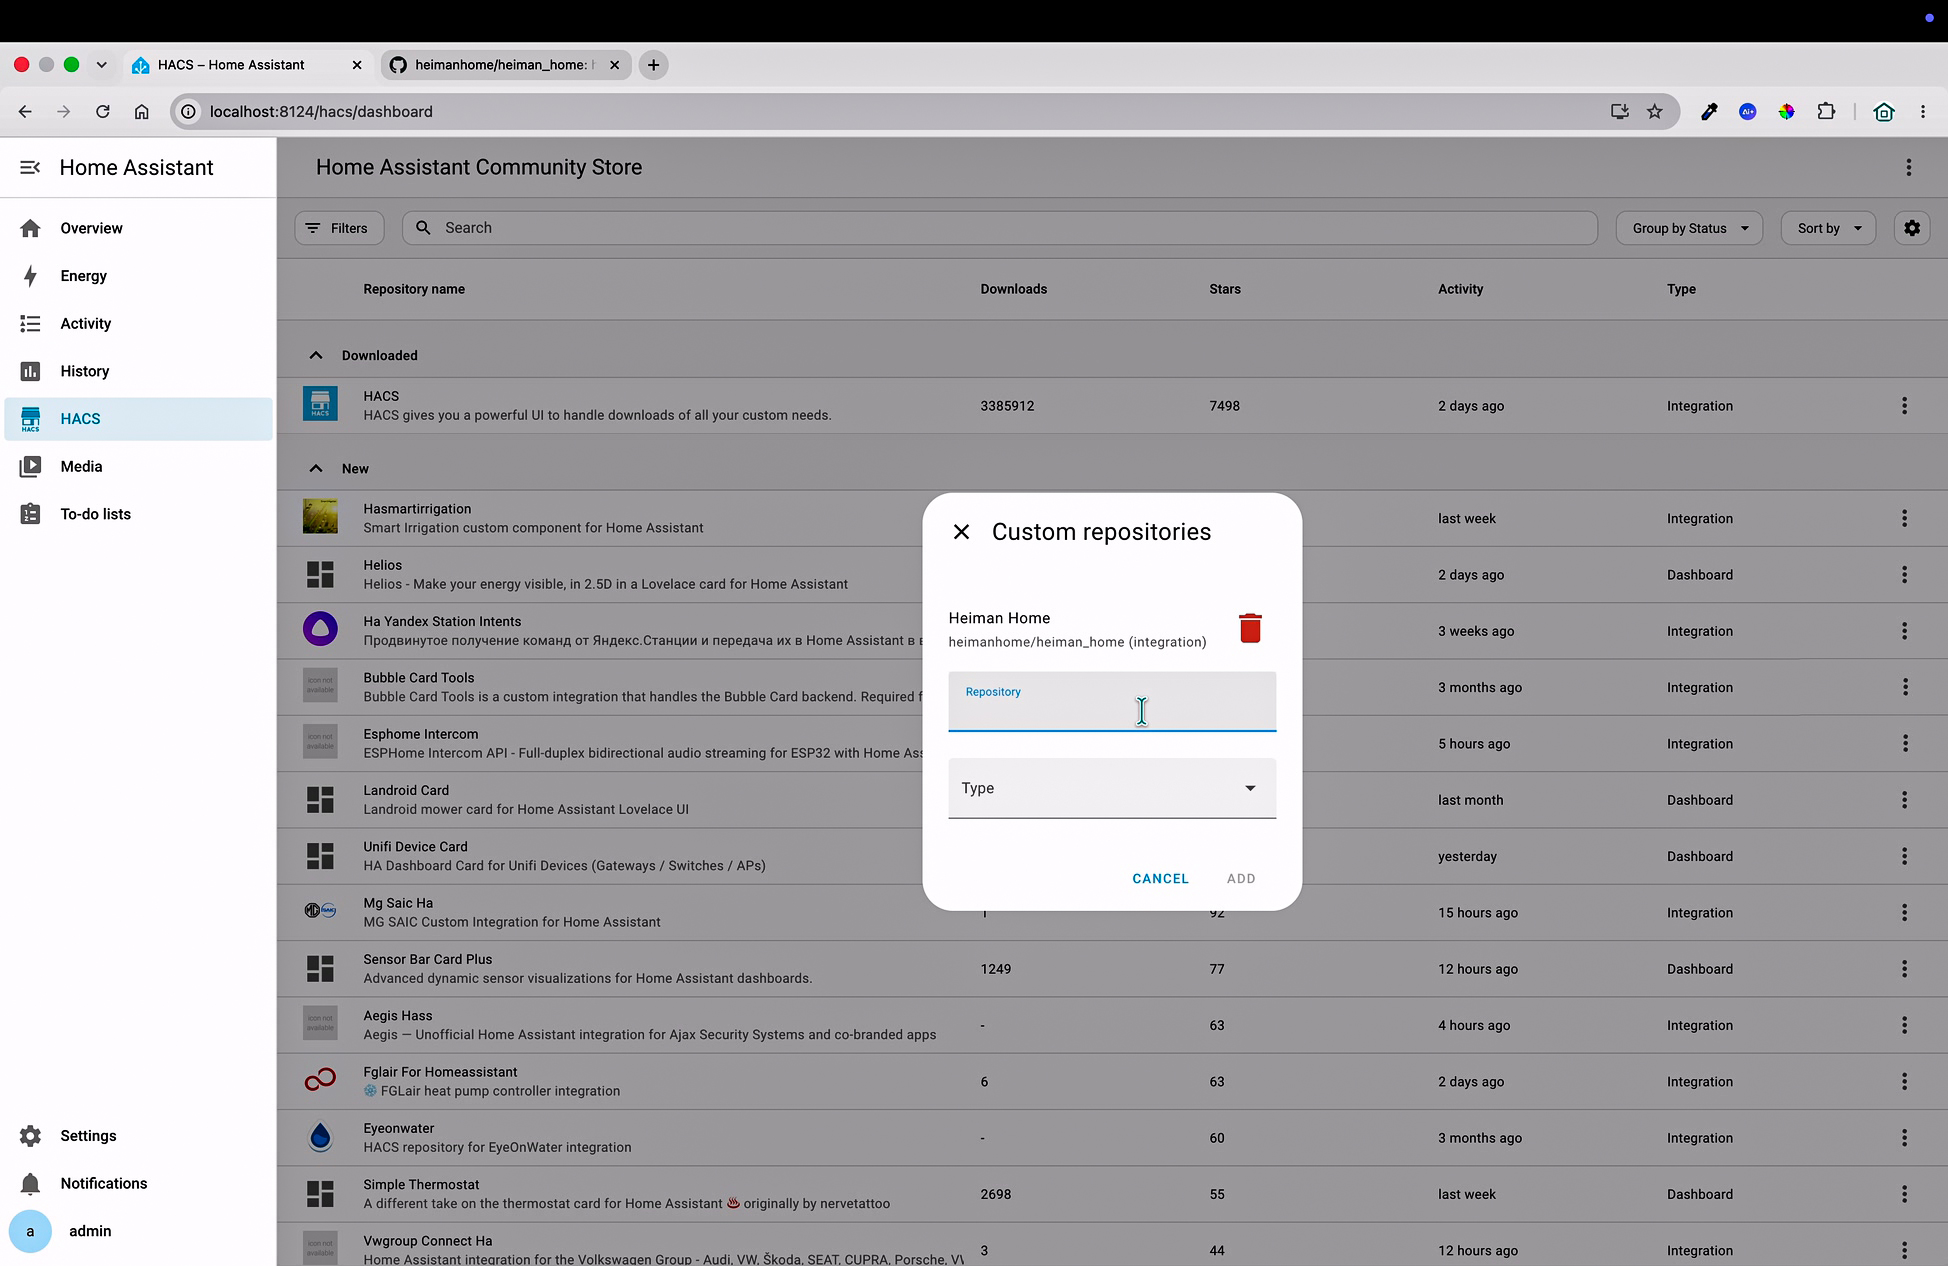
- In the "Add custom repository URL" field, enter:
https://github.com/heimanhome/heiman_home
- For the Type dropdown, select Integration
- Click ADD
Step 3: Find and download Heiman Home
- Back in the HACS main page, use the search bar to search for "Heiman Home"
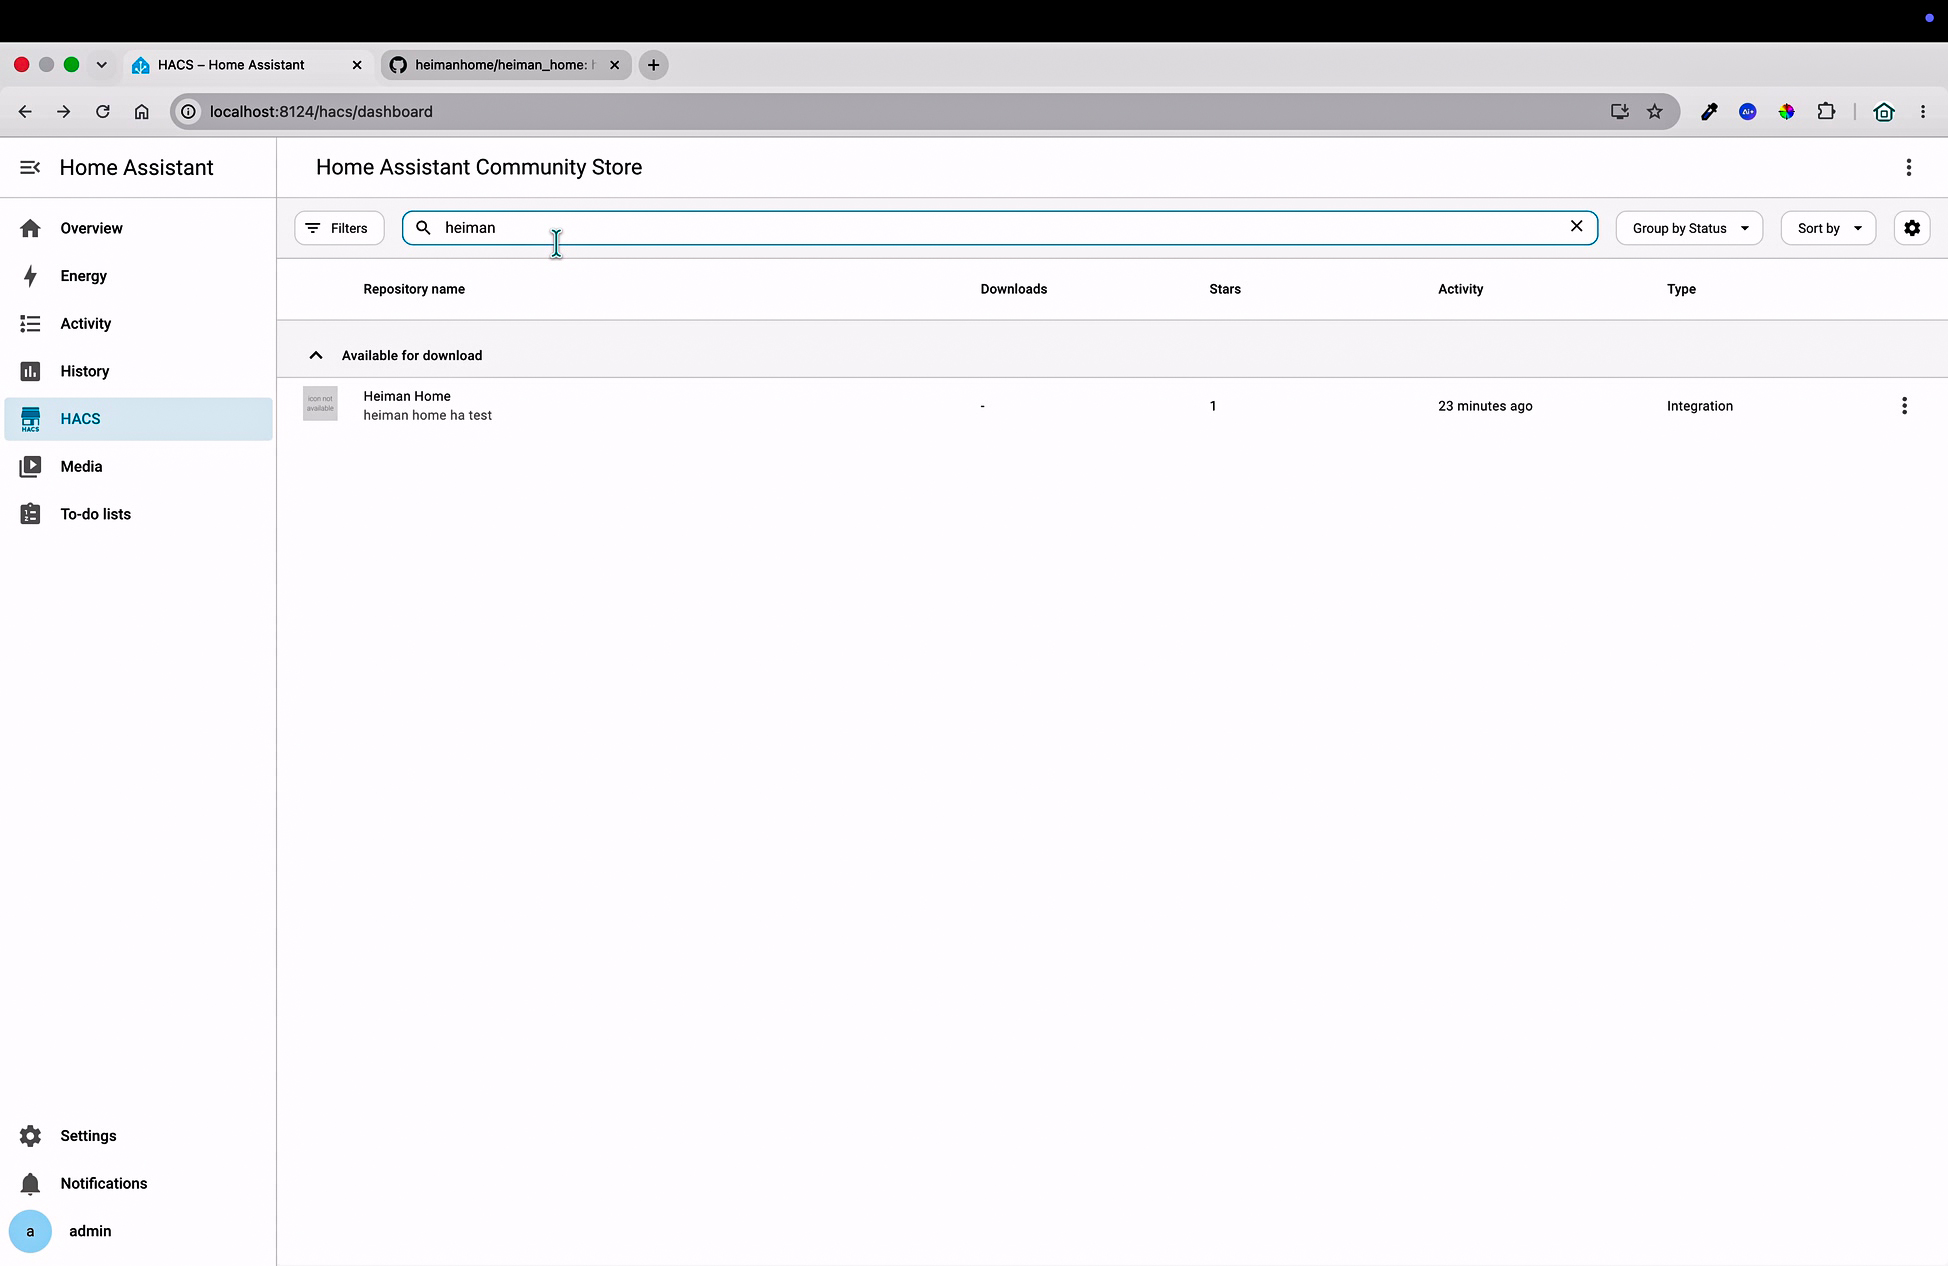
- Click on the Heiman Home integration from the results
- Click the Download button in the bottom-right corner
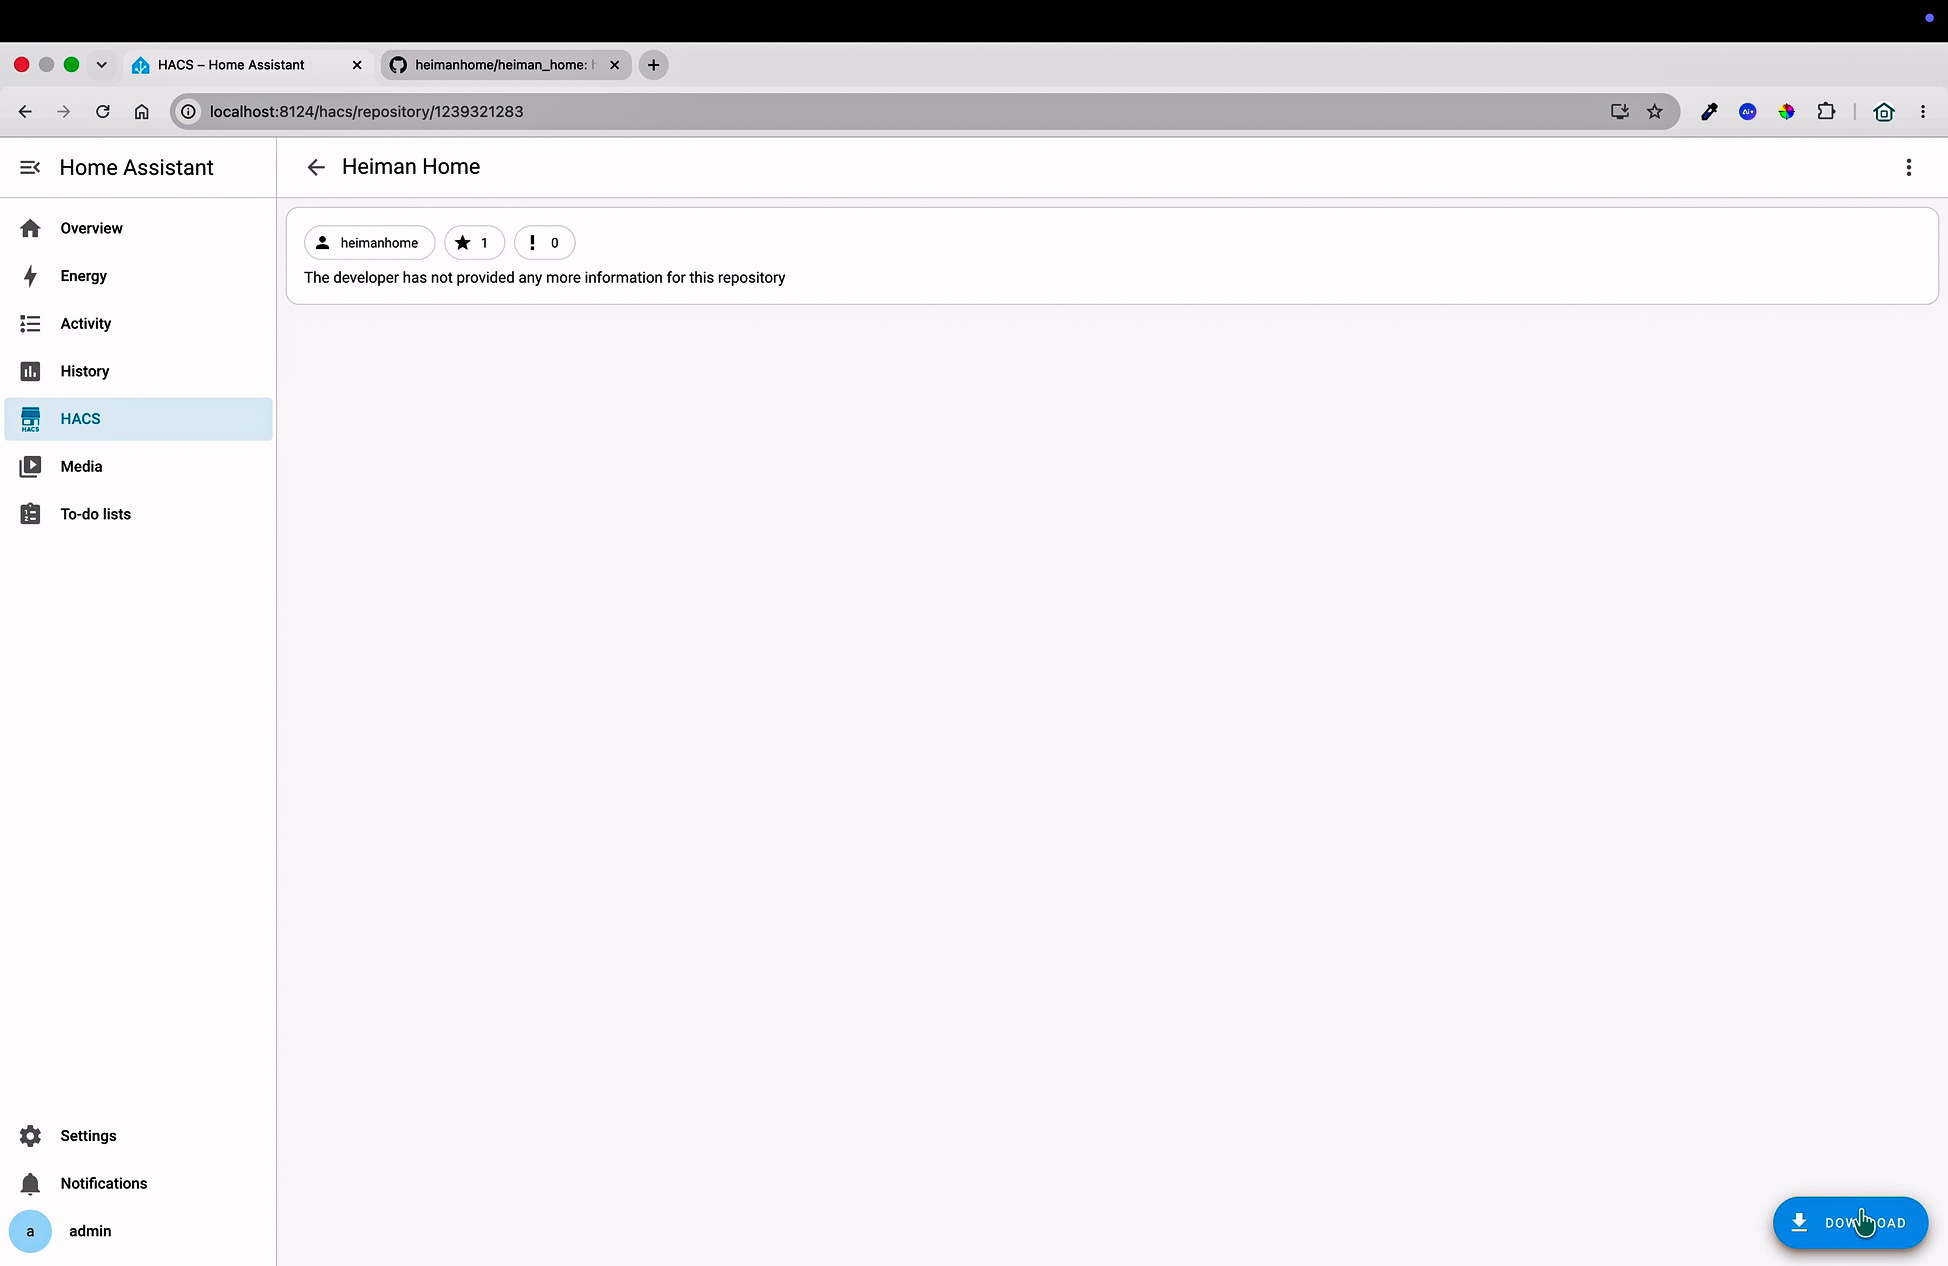
Step 4: Select version and download
- A popup will appear showing the version to download
- Select the latest available version
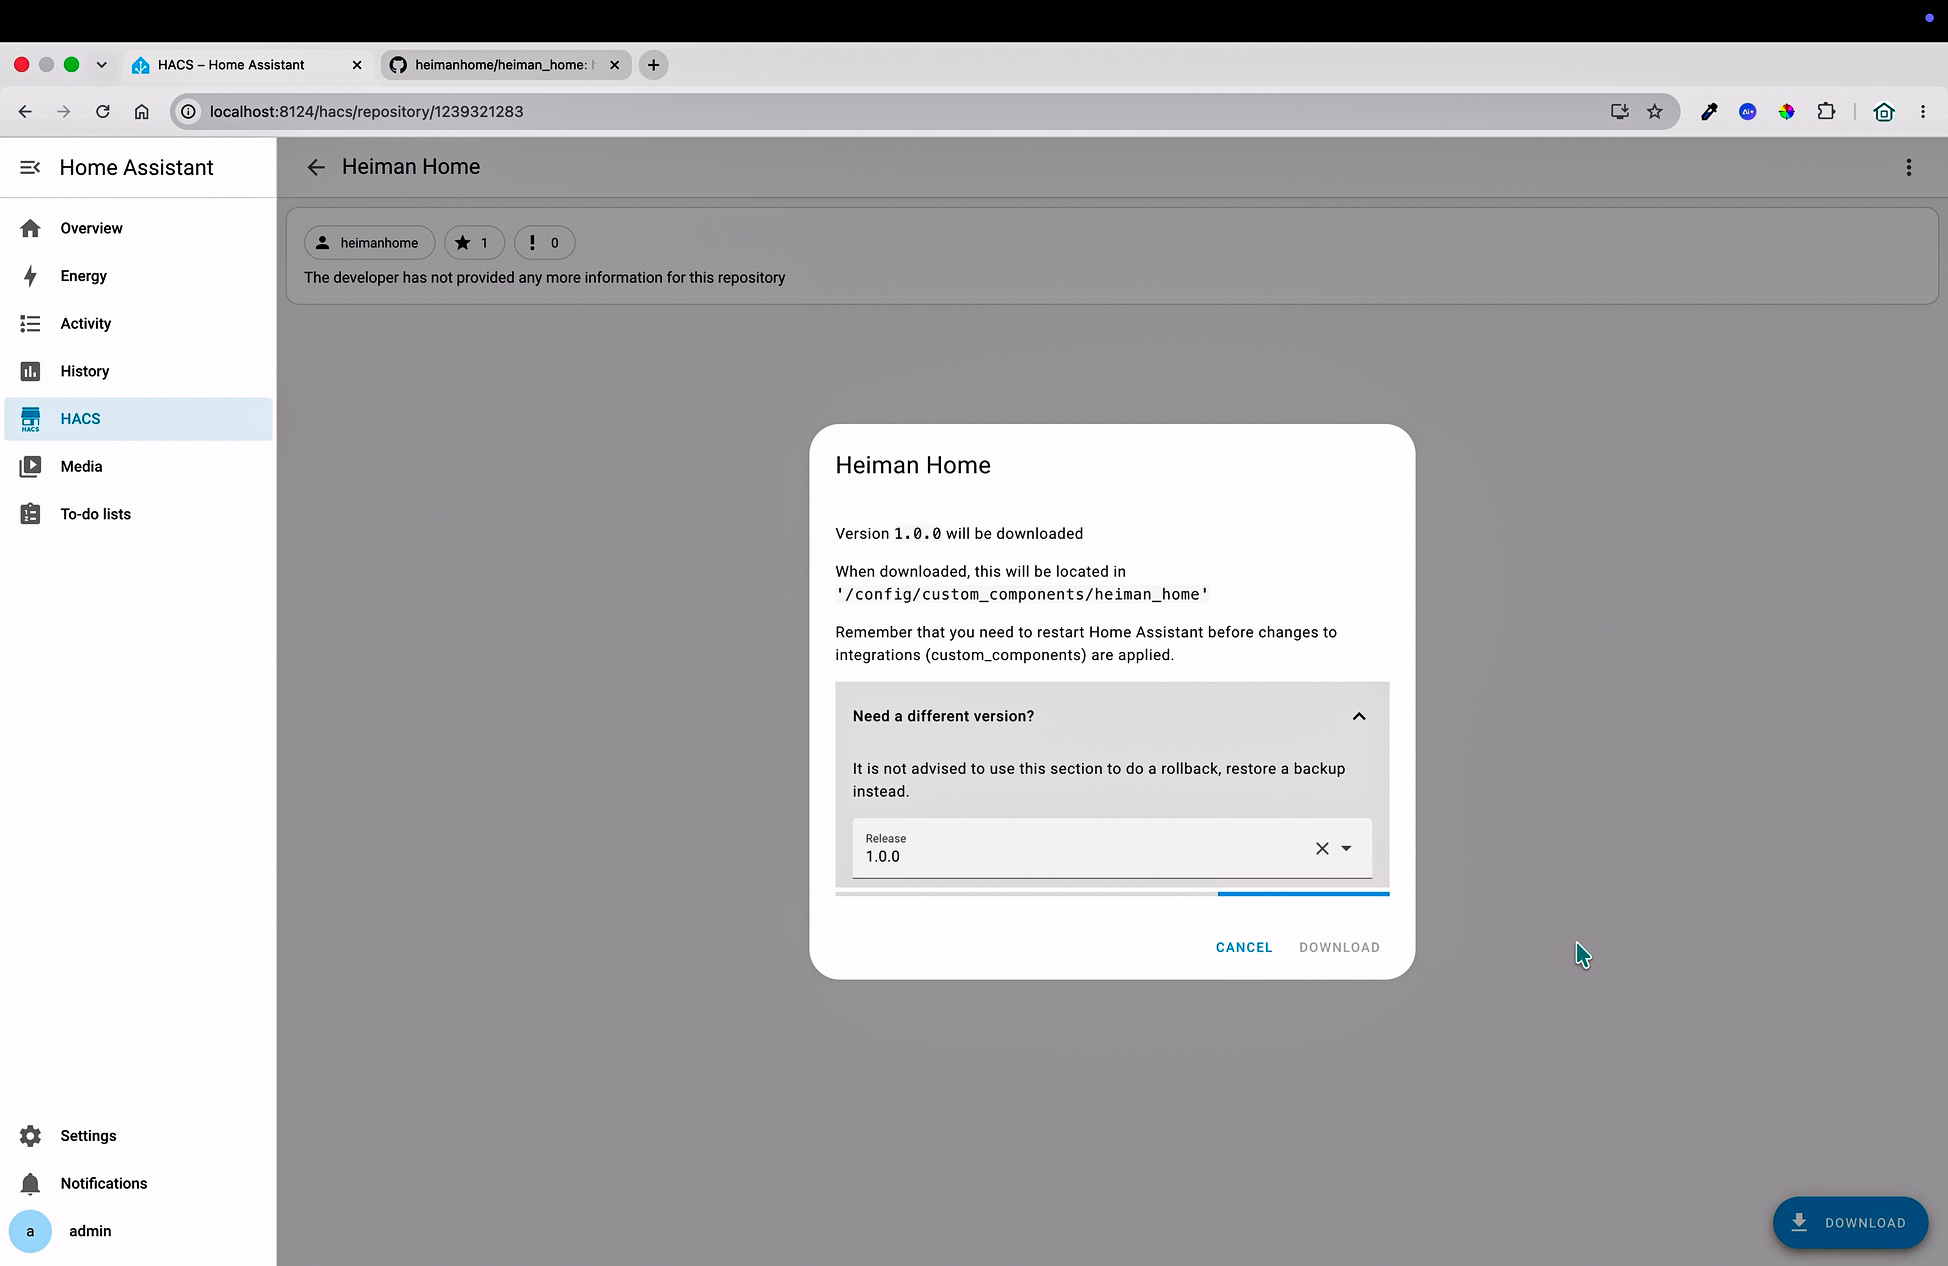
- Click Download
- Note: The integration files will be installed in /config/custom_components/heiman_home/
Step 5: Restart Home Assistant
- After downloading, go to Settings
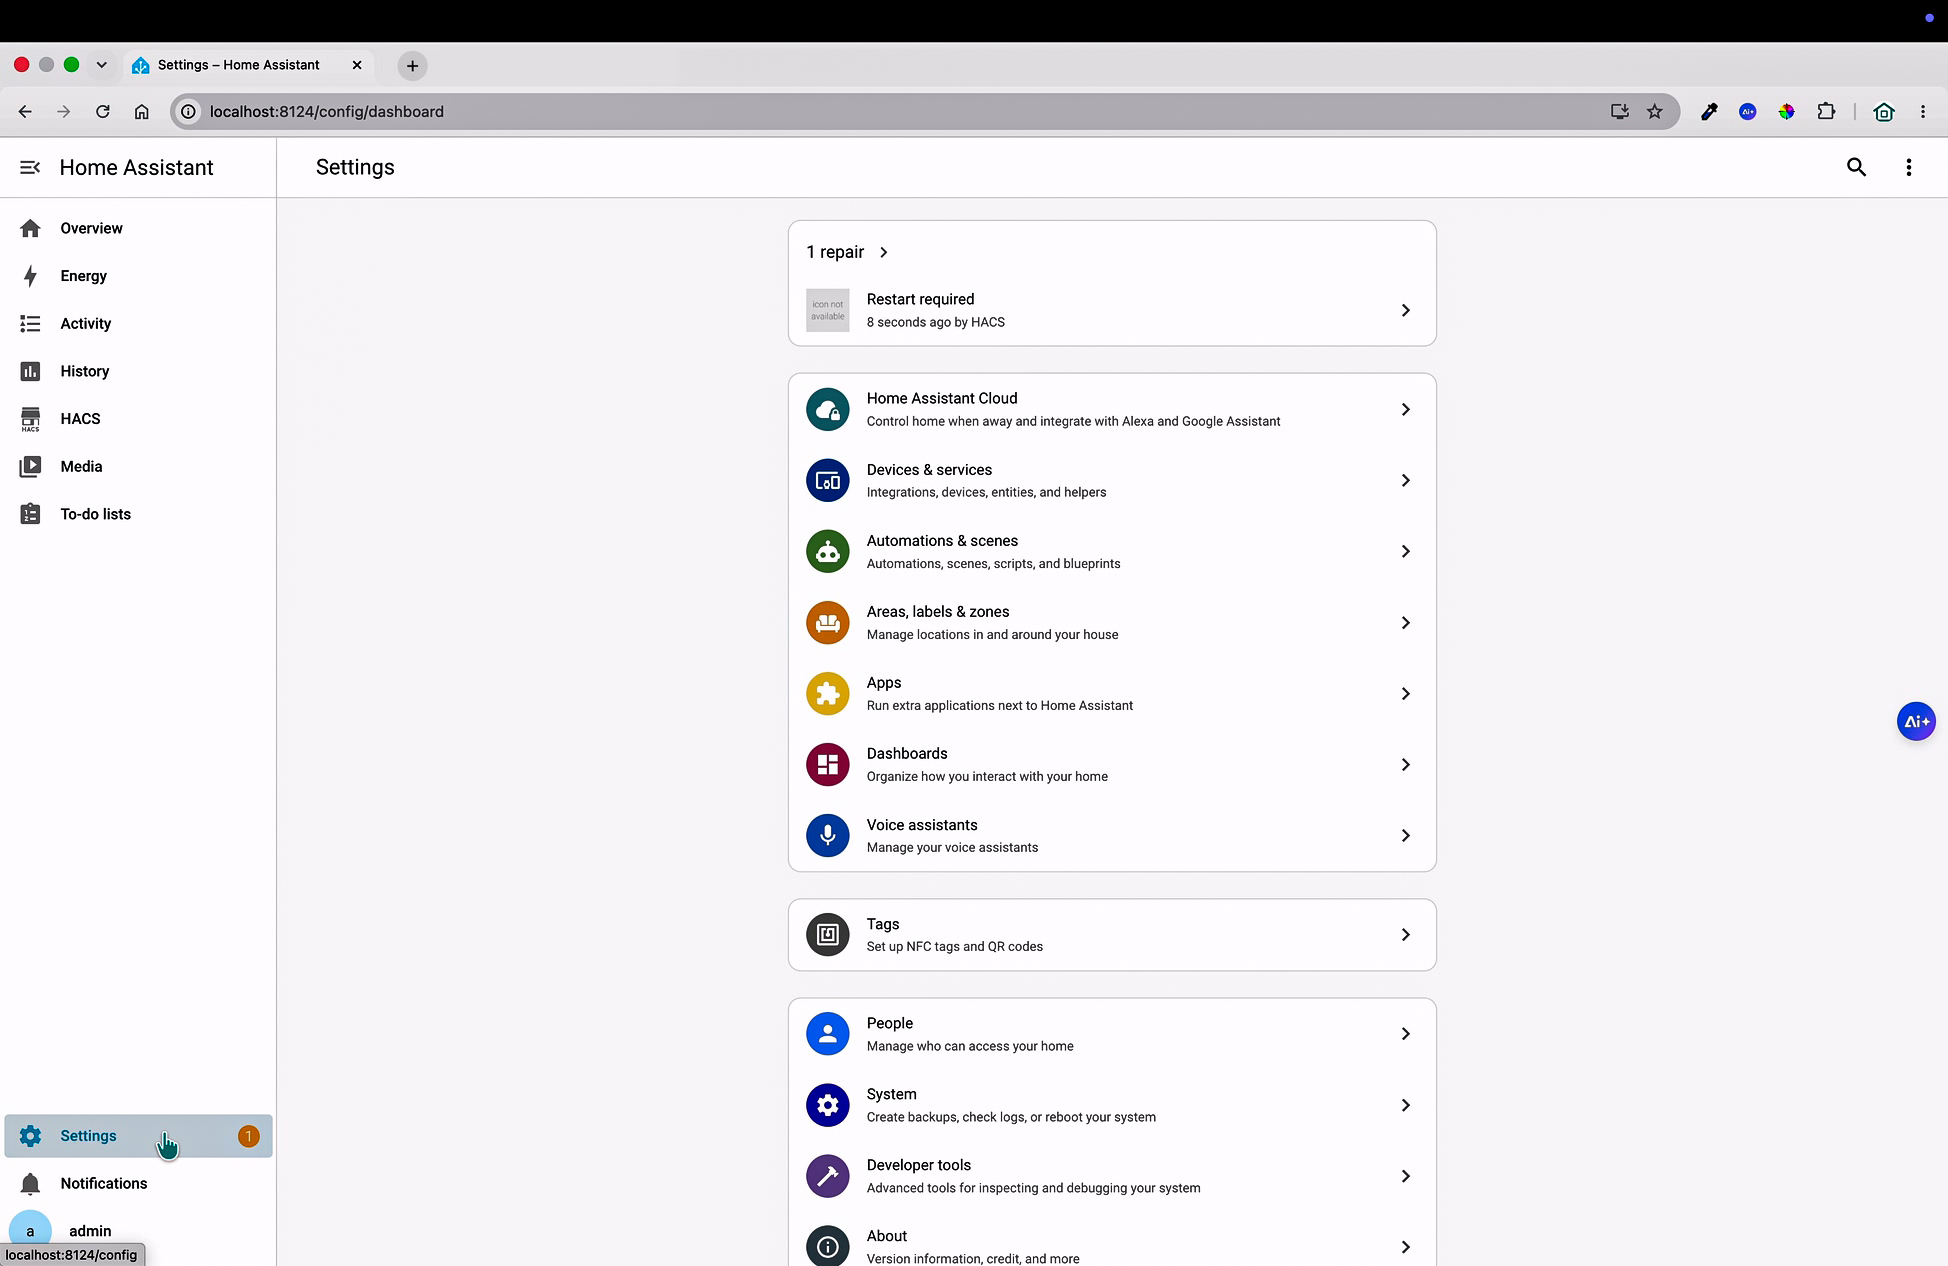
- You'll see a "Restart required" notification from HACS
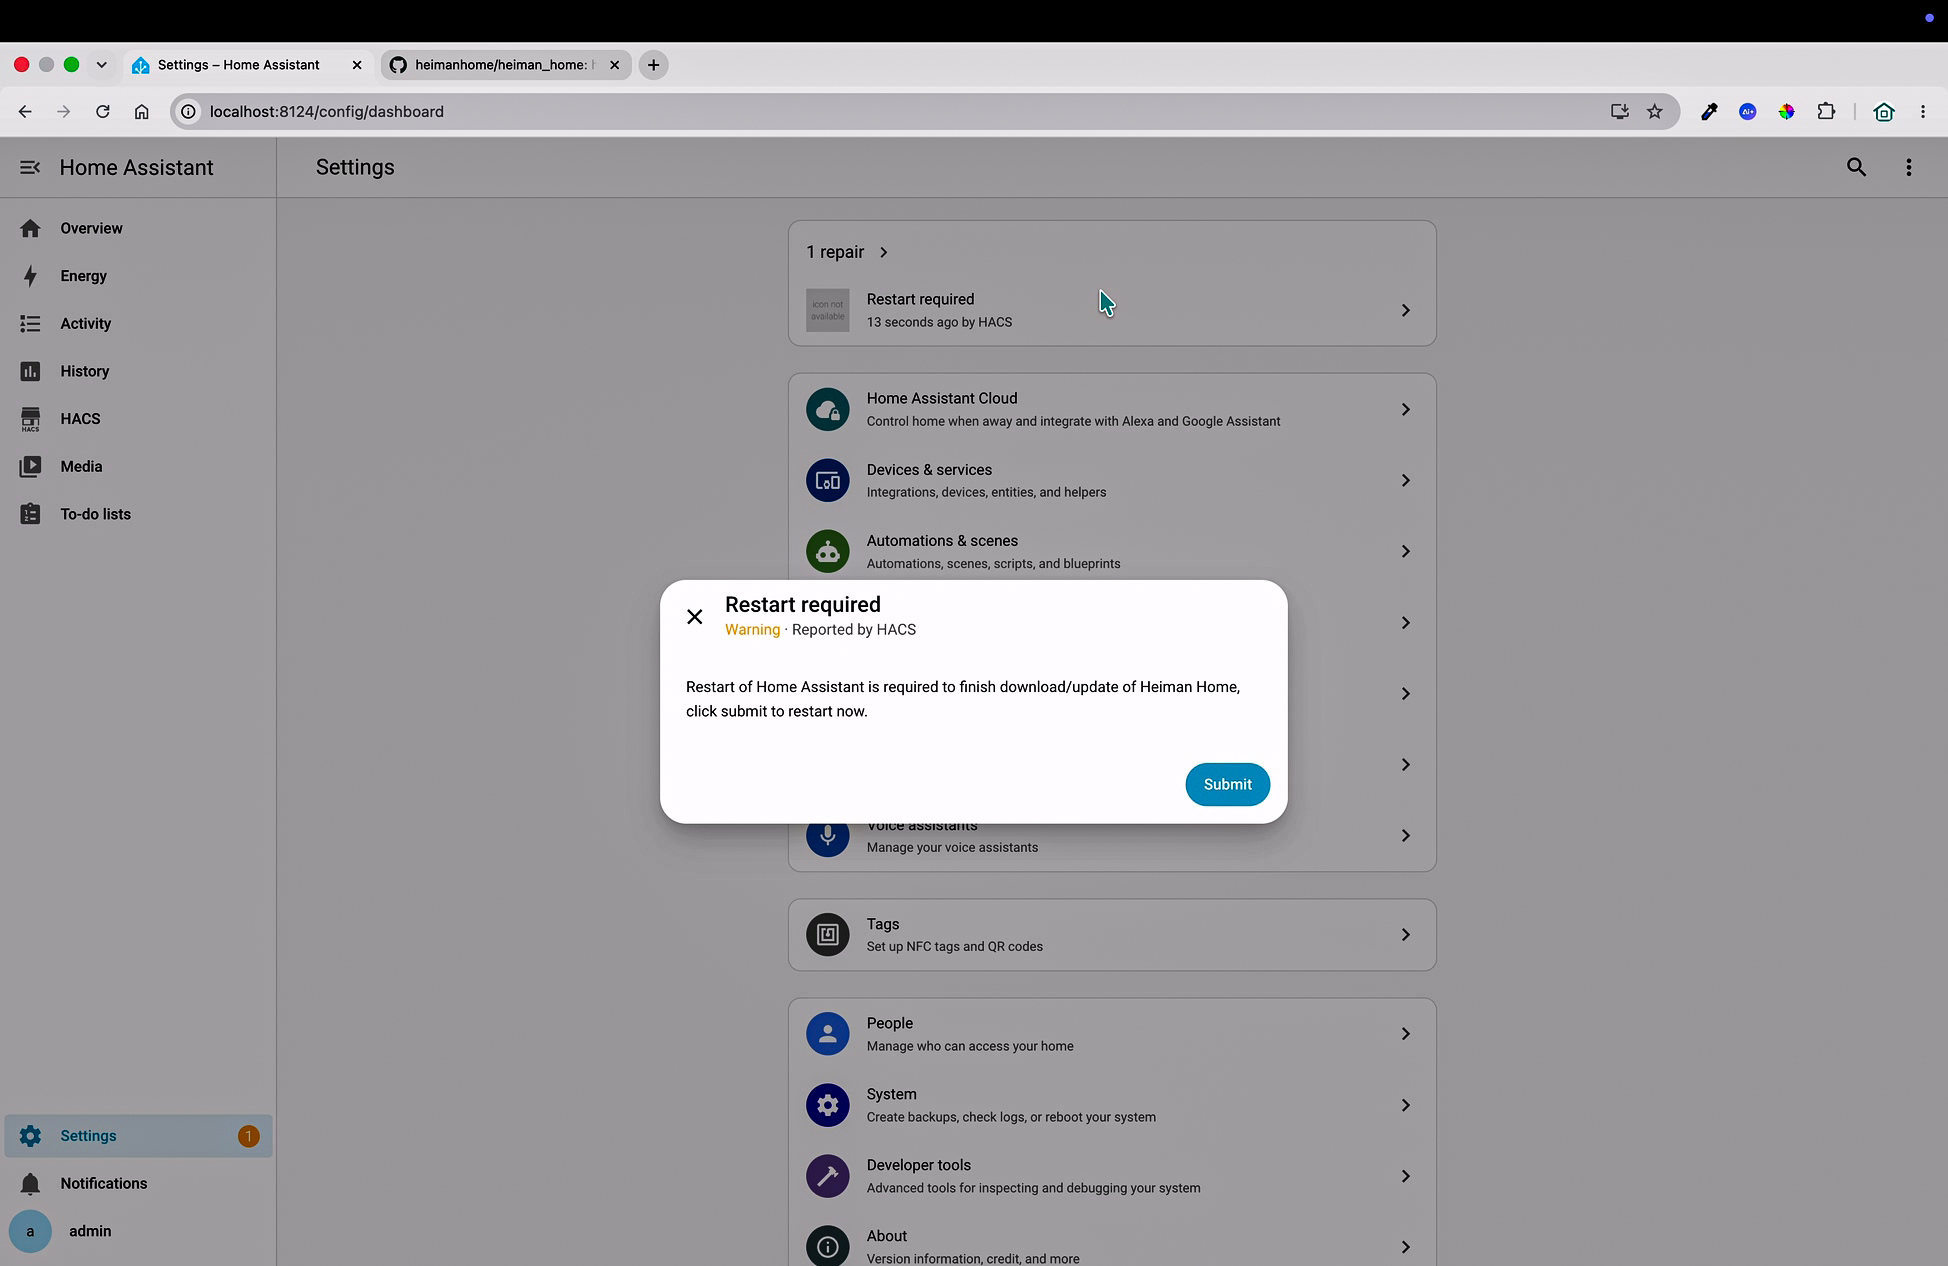
- Click on it, then click Submit to restart Home Assistant
- Wait for Home Assistant to fully restart (this usually takes 30-60 seconds)
Step 6: Add the Heiman Home integration
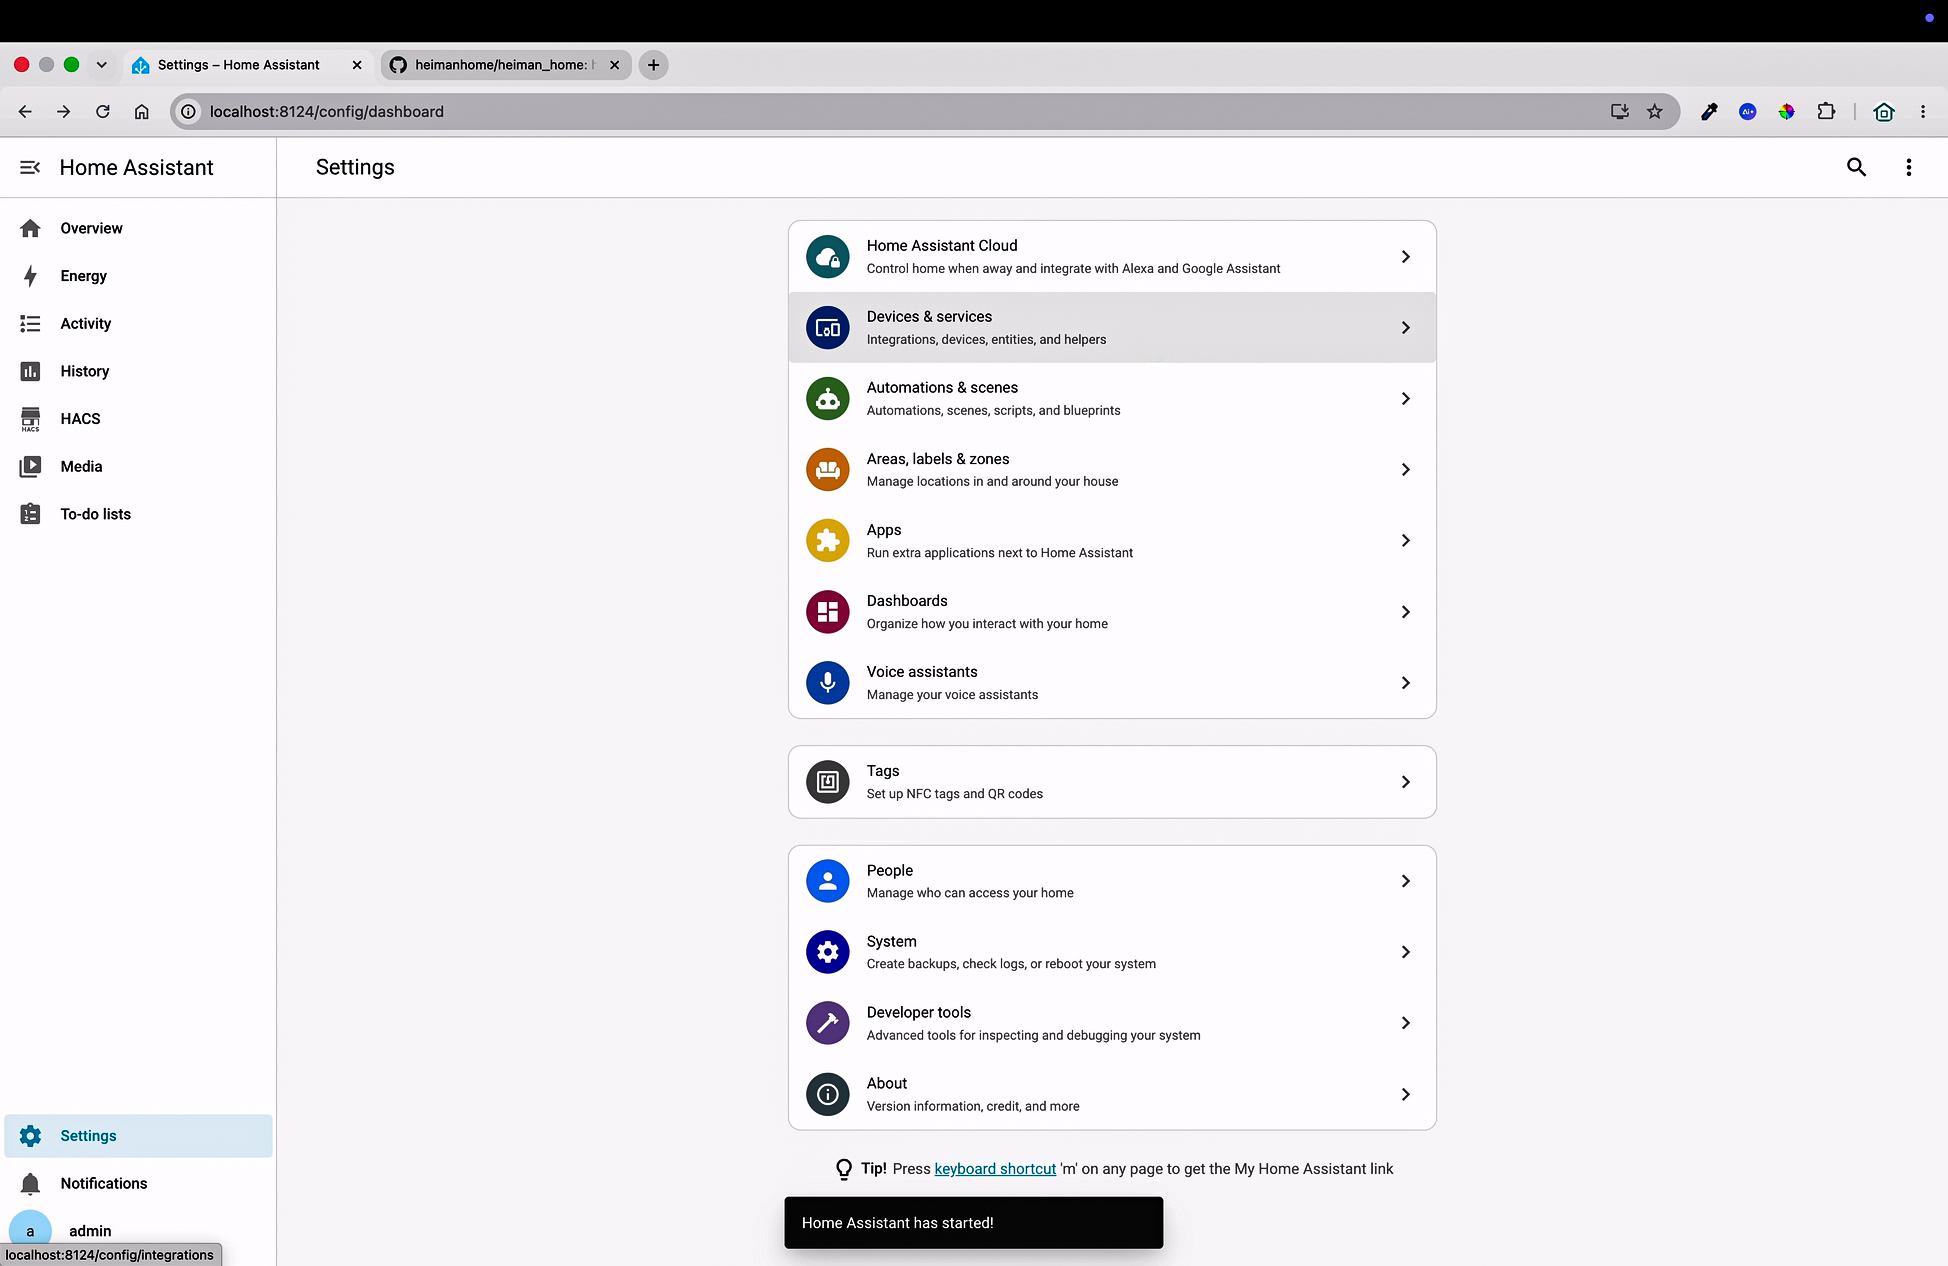
- Once Home Assistant is back up, go to Settings → Devices & Services
- Click the Add Integration button
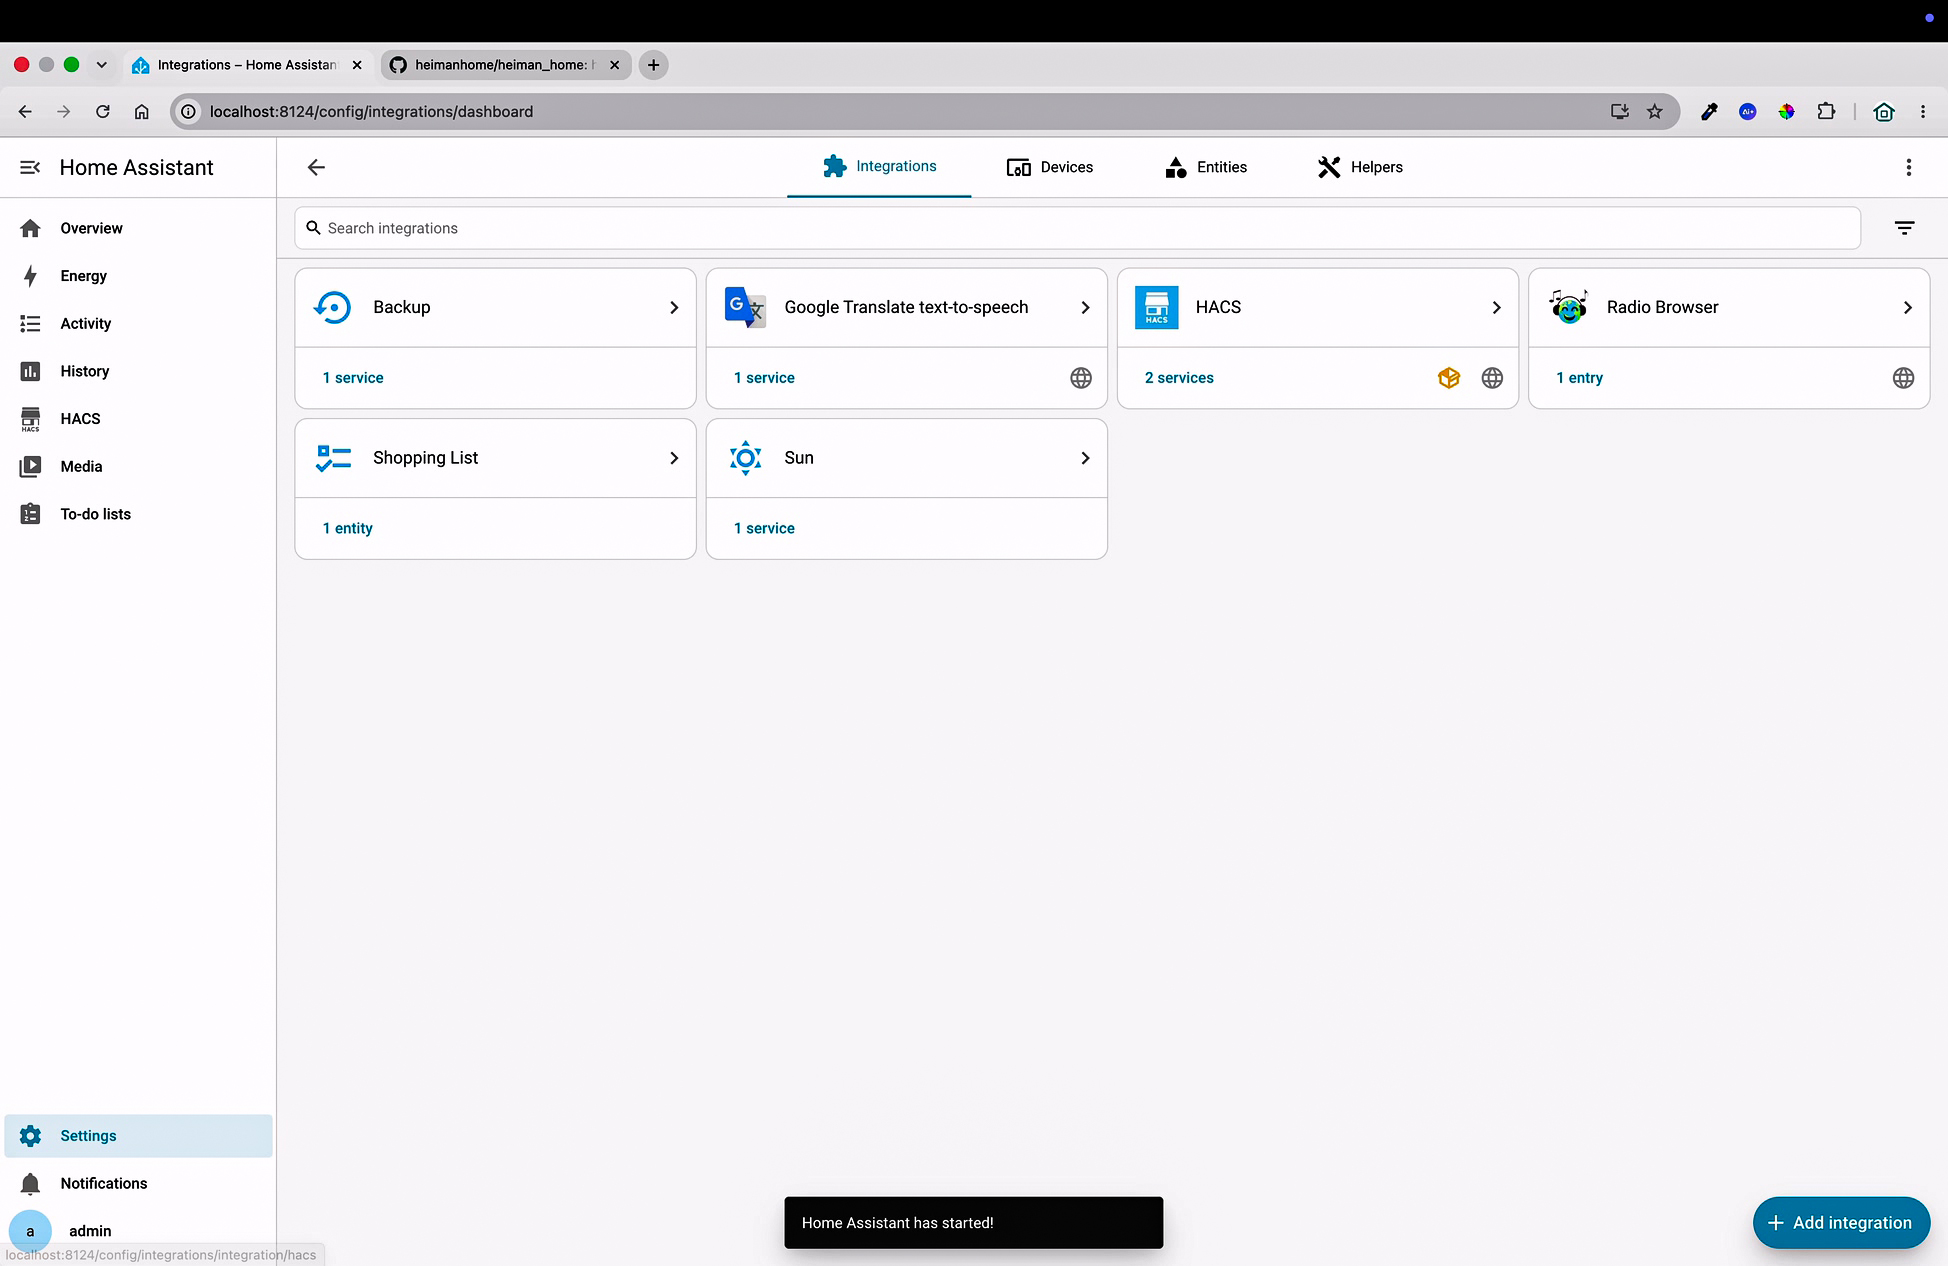
- Search for "Heiman Home" and select it
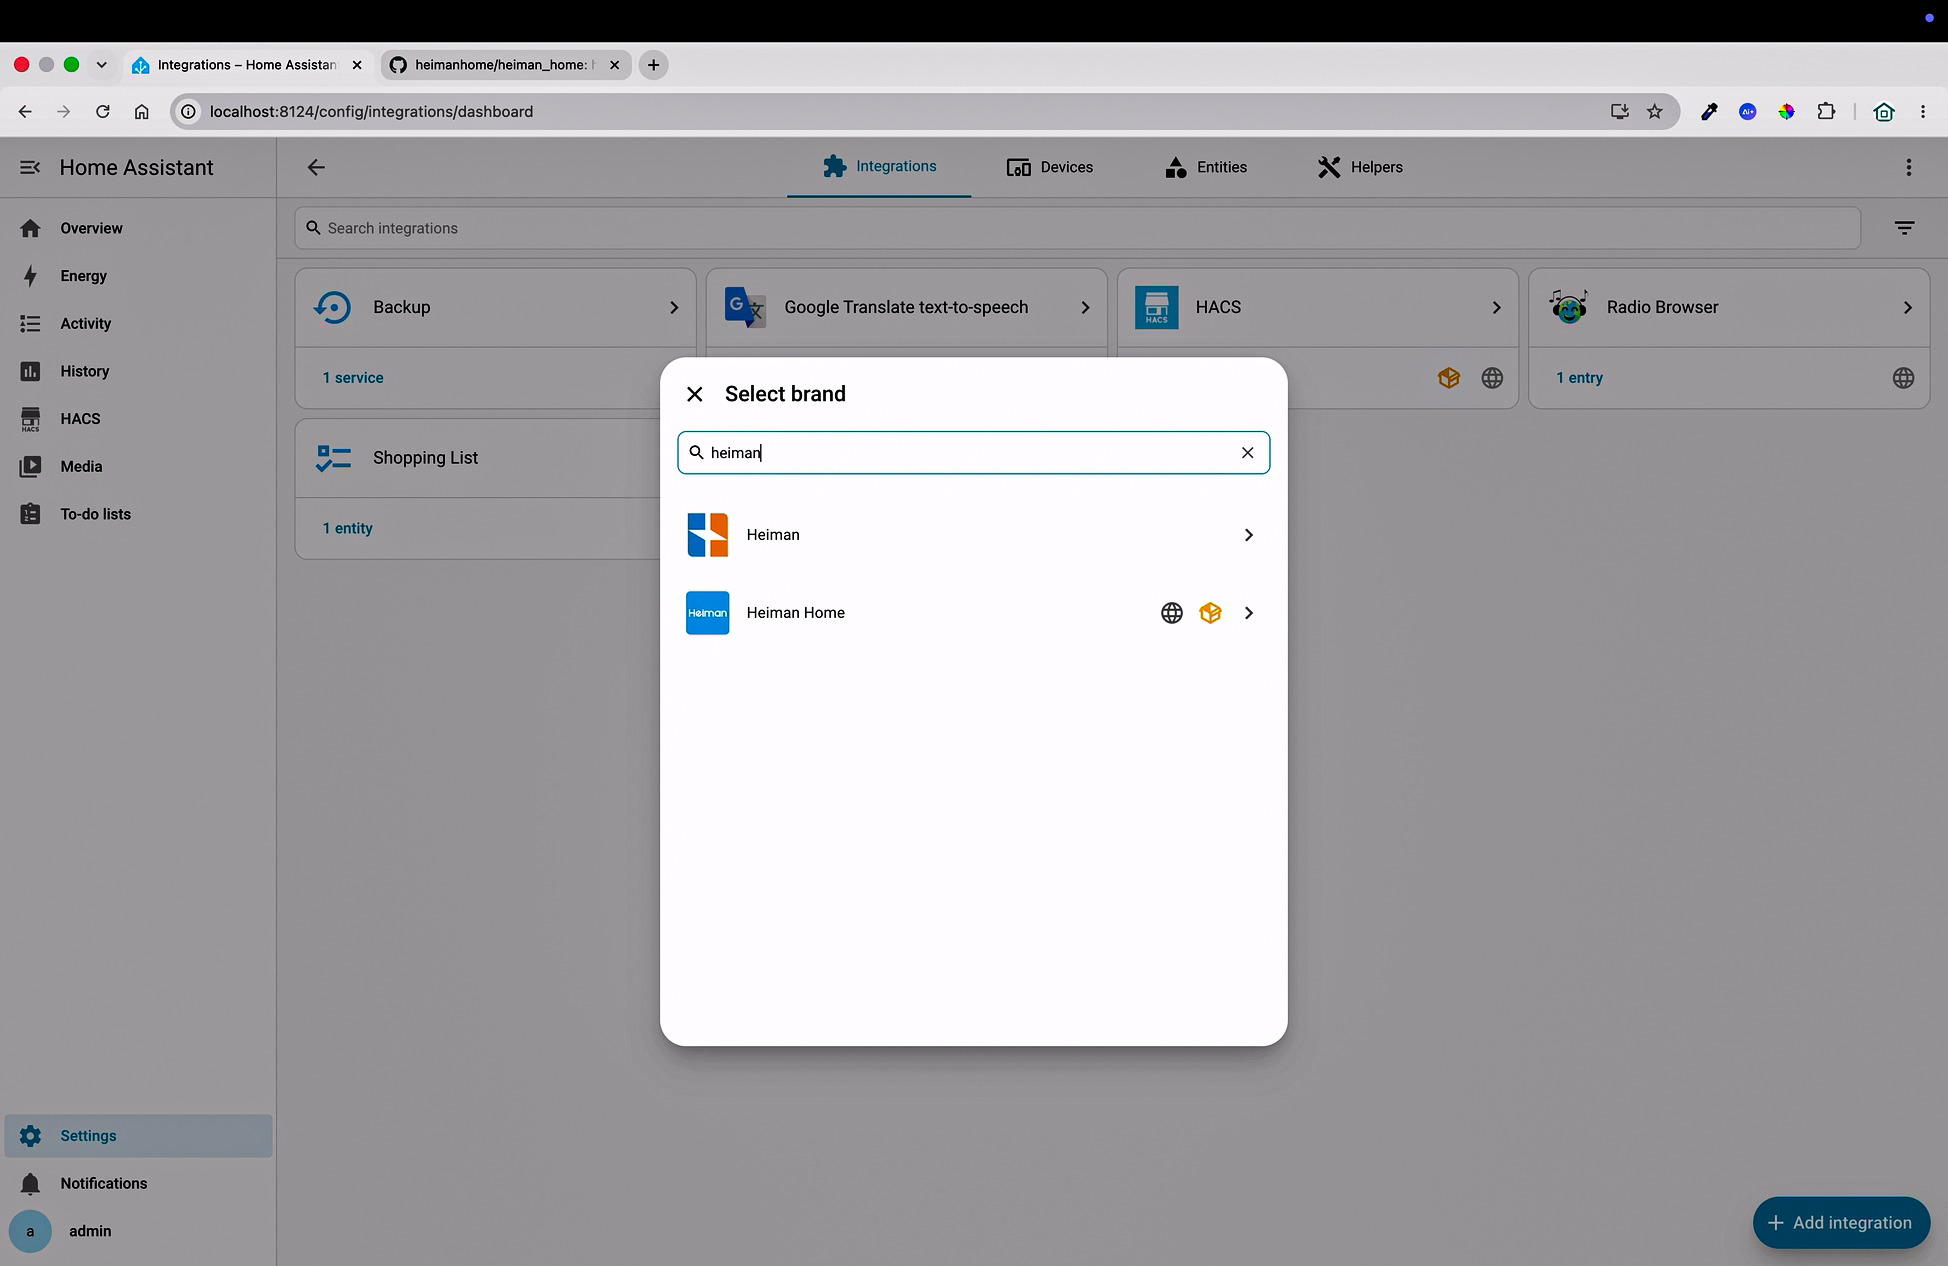
Step 7: Link your Heiman Home account
- You'll be redirected to the Heiman account login page
- Enter your Heiman Home account email and password
- Click Login
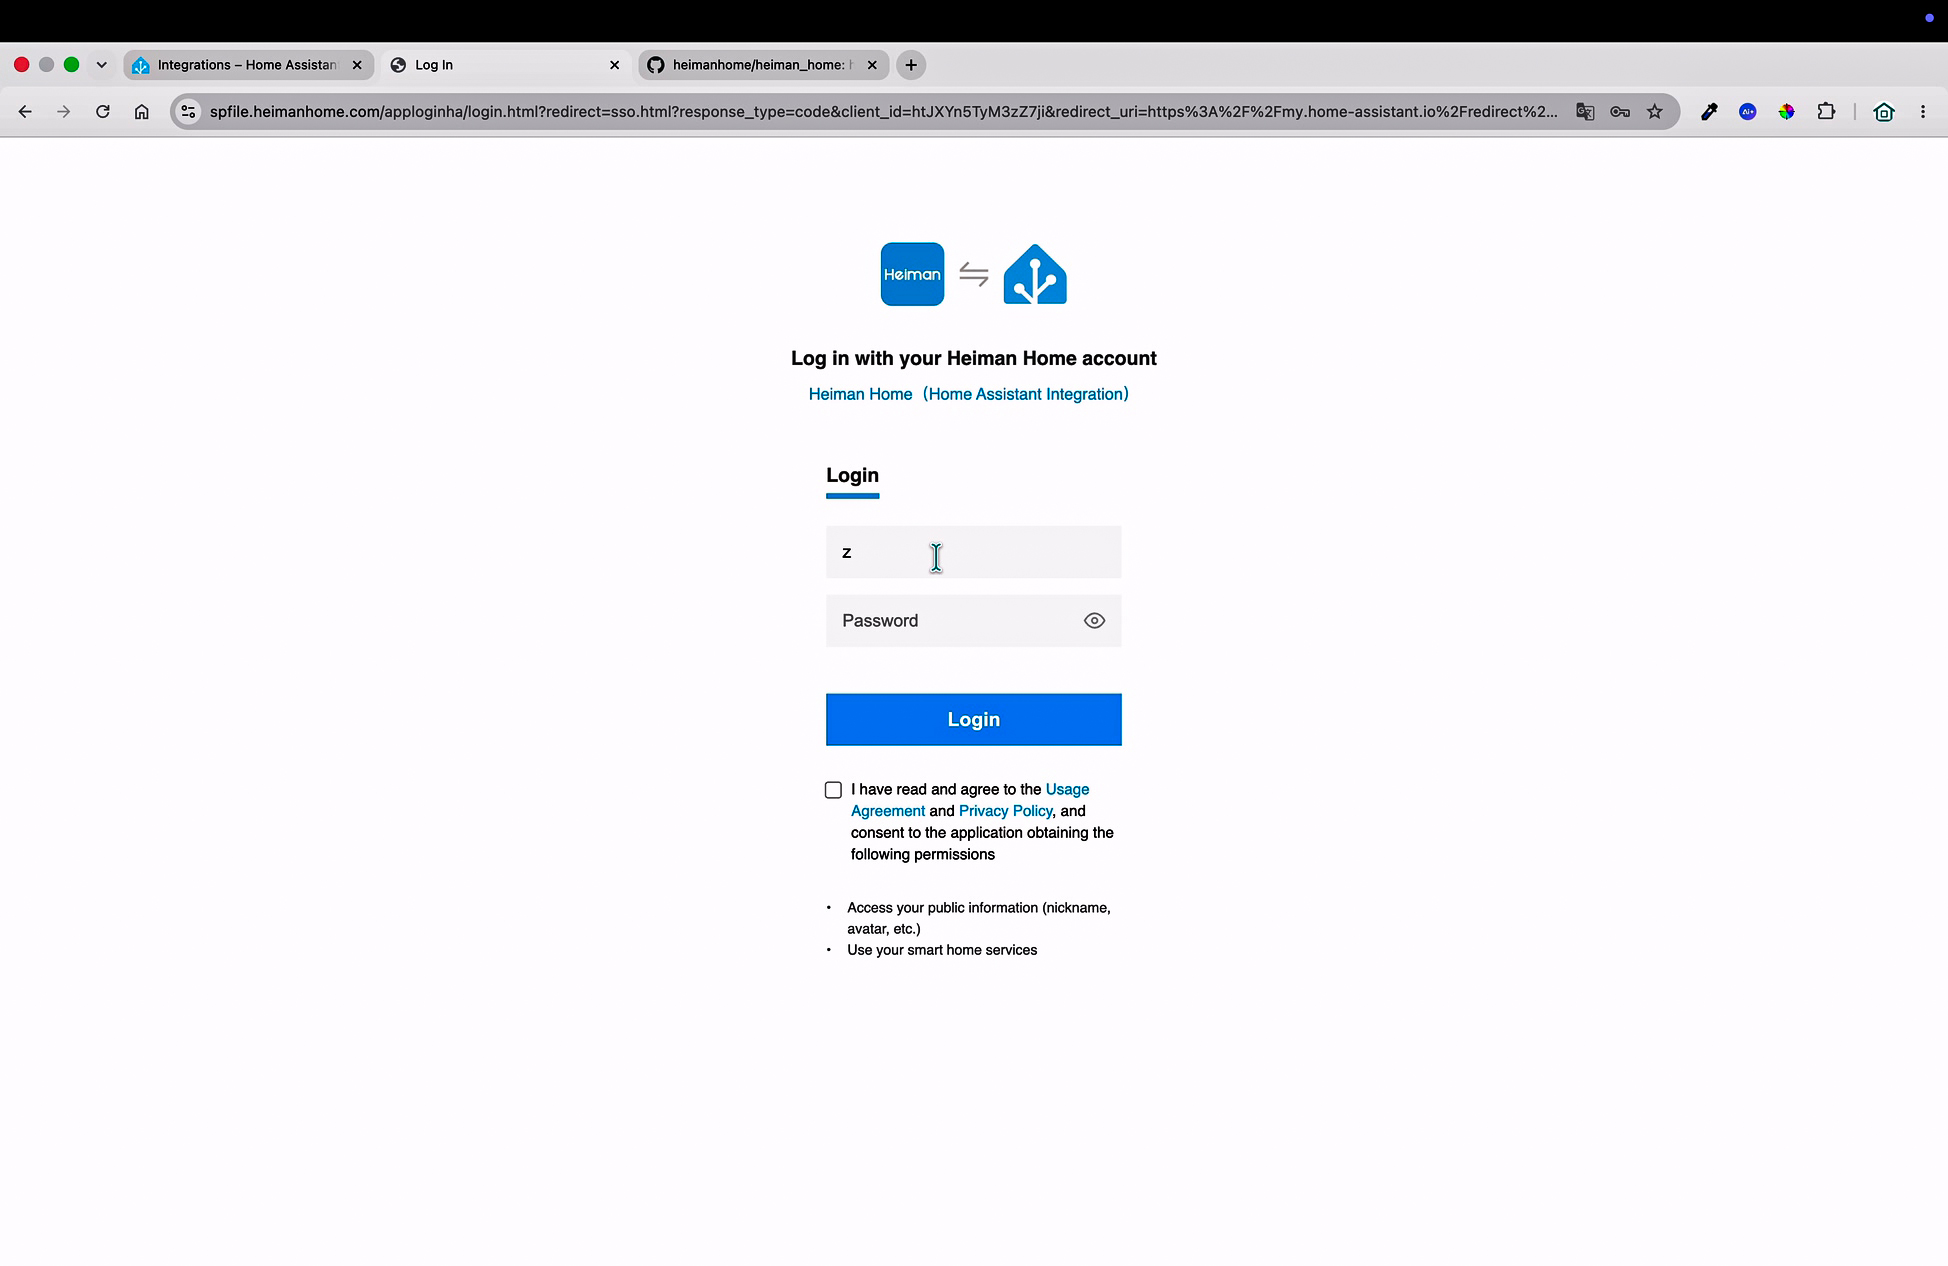
- Check all permission boxes (Exchange token, Control device)
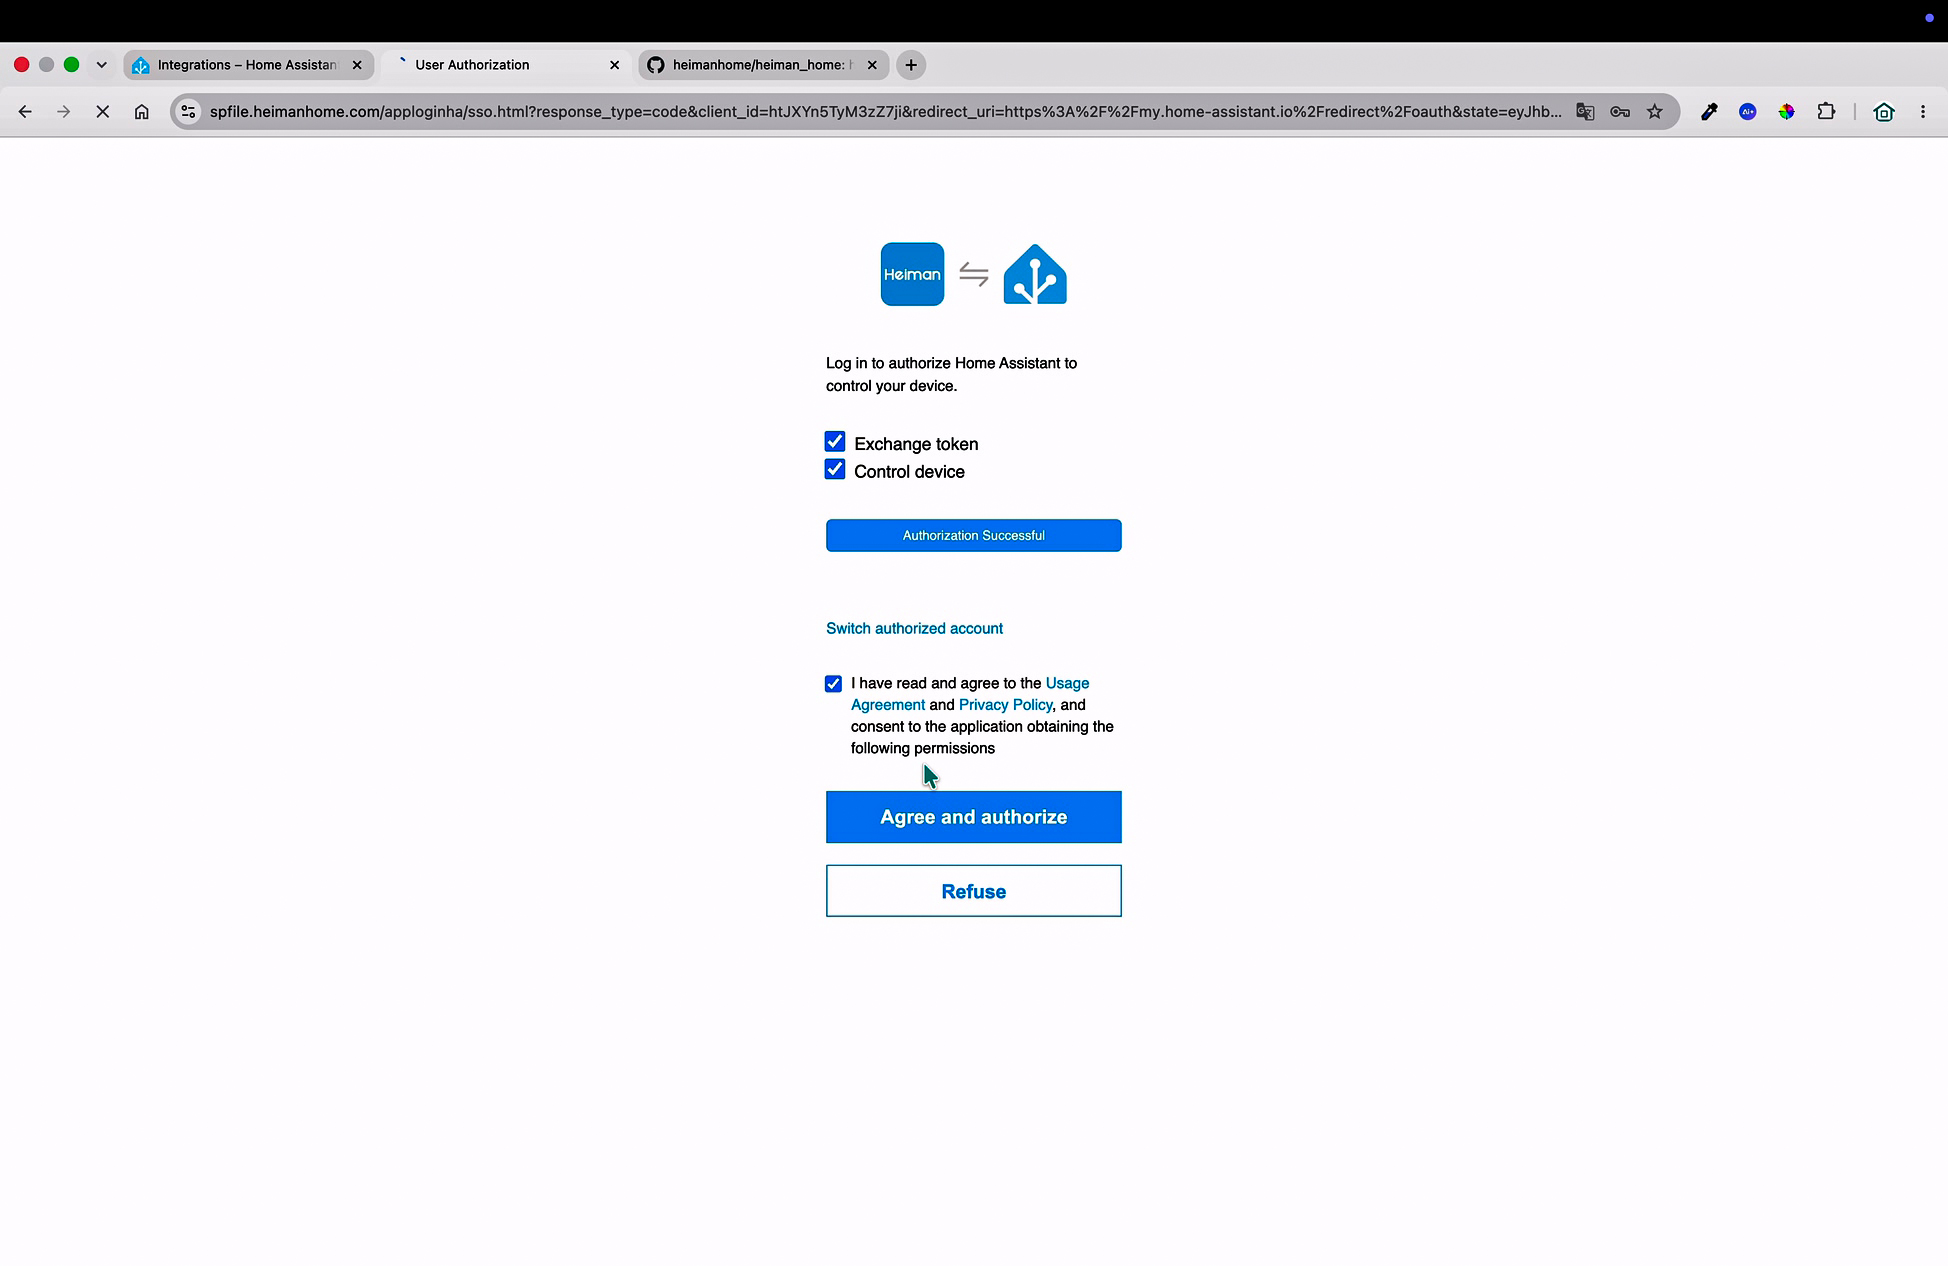
- Click Agree and authorize
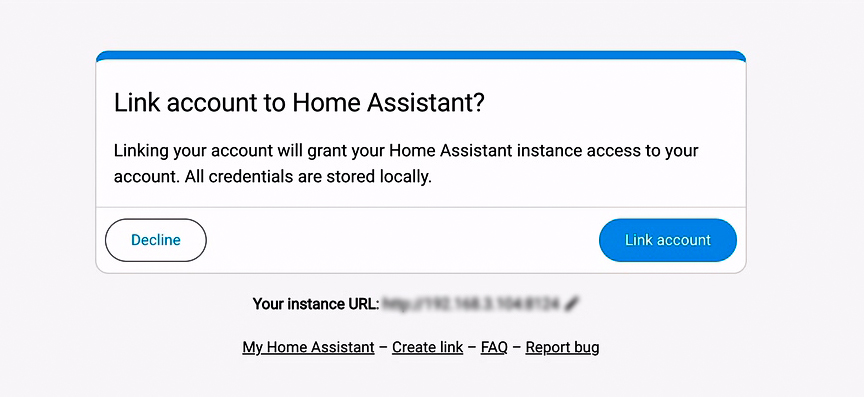
- Confirm your Home Assistant instance URL is correct
- Click Link account
- Select your home from the matched Heiman account homes
- Click Submit
That's it! Your Heiman Home account is now linked. All your smoke detectors, gateways, and other Heiman devices will sync automatically to Home Assistant. You can view them all on the Devices page.
Setting up device automations
Once your devices are connected, you'll want to set up automations so you get notified instantly when smoke is detected. Here's how to do it from the Home Assistant mobile App:
Step 1: Open Automations
- Open the Home Assistant mobile app on your phone
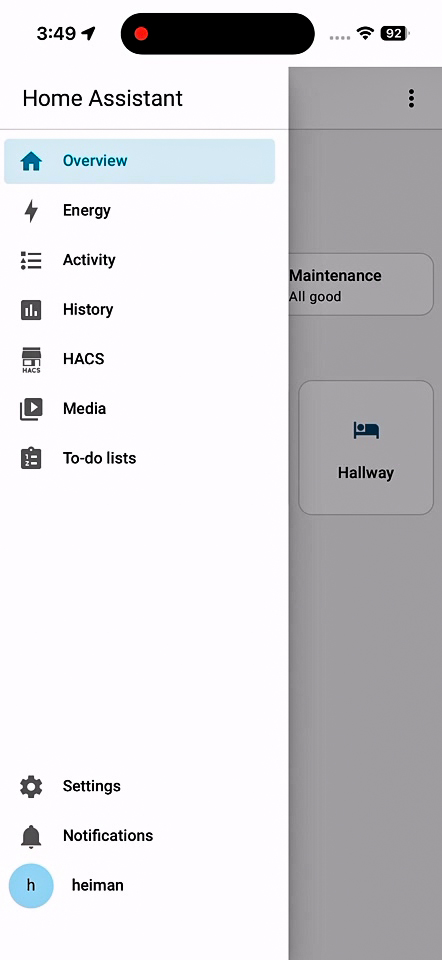
- Tap the menu icon (☰) and go to Settings
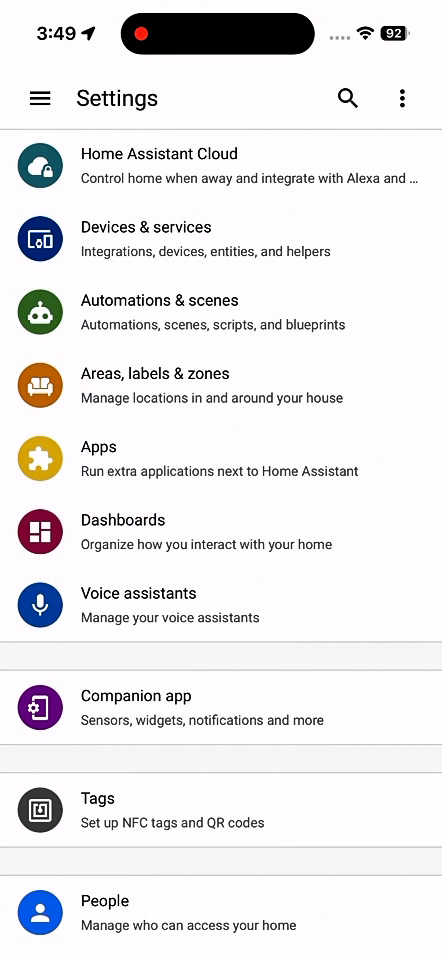
- Select Automations & scenes
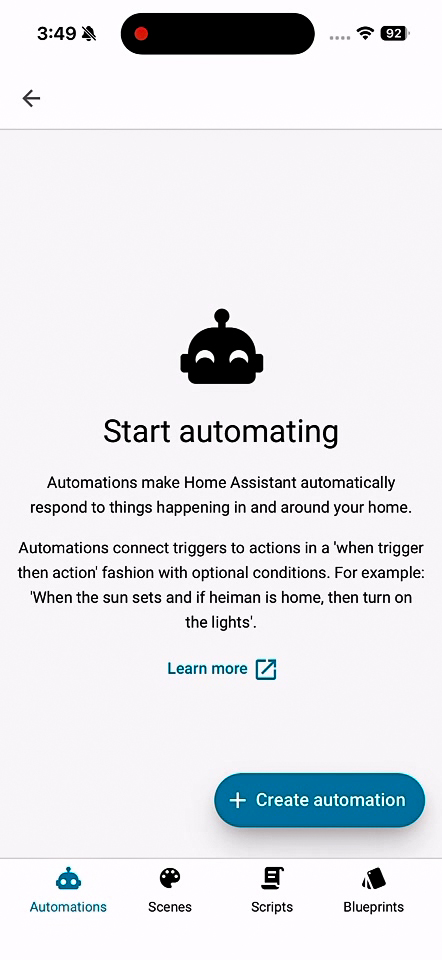
- Tap + Create automation in the bottom-right corner
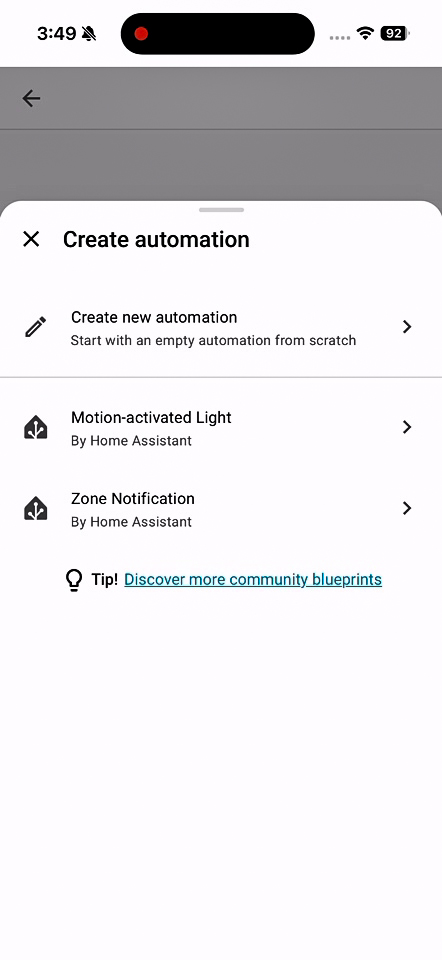
Step 2: Create a new automation from scratch
- Select Create new automation (Start with an empty automation from scratch)
Step 3: Add a trigger
- Under the "When" section, tap + Add trigger
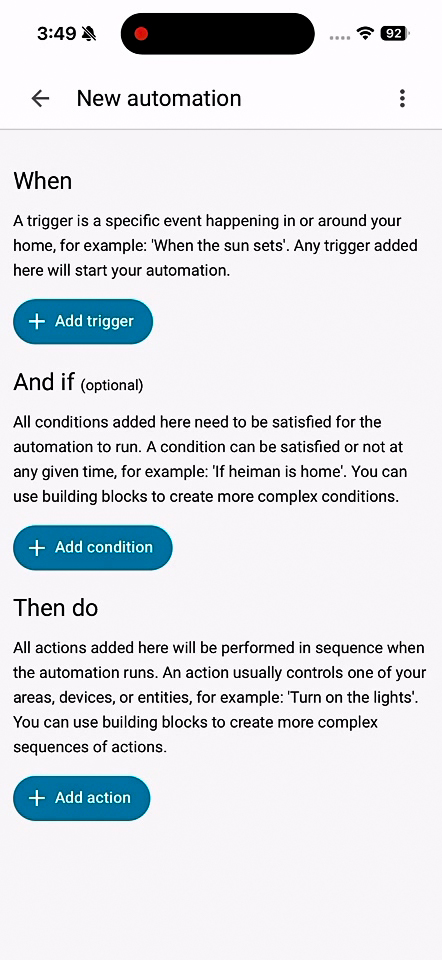
- Select Device from the trigger type list
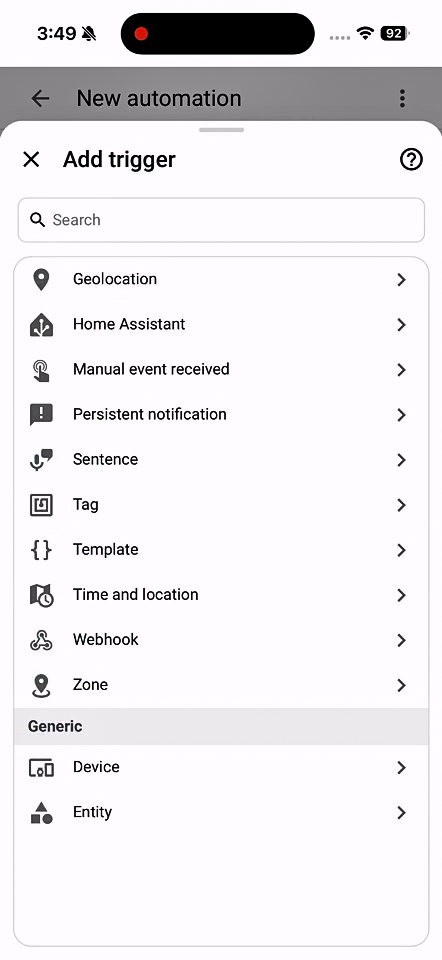
- Choose your smart device from the device list (e.g., "Smoke Alarm 2")
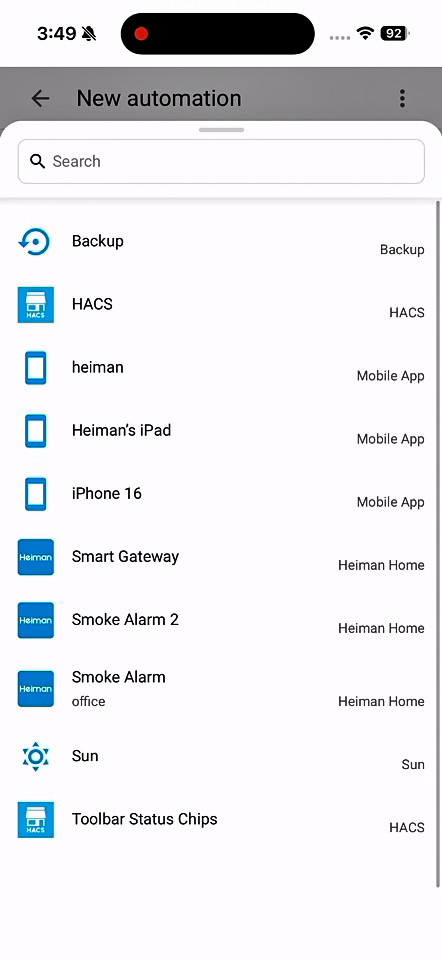
- For the trigger, select "Smoke Alarm started detecting smoke"
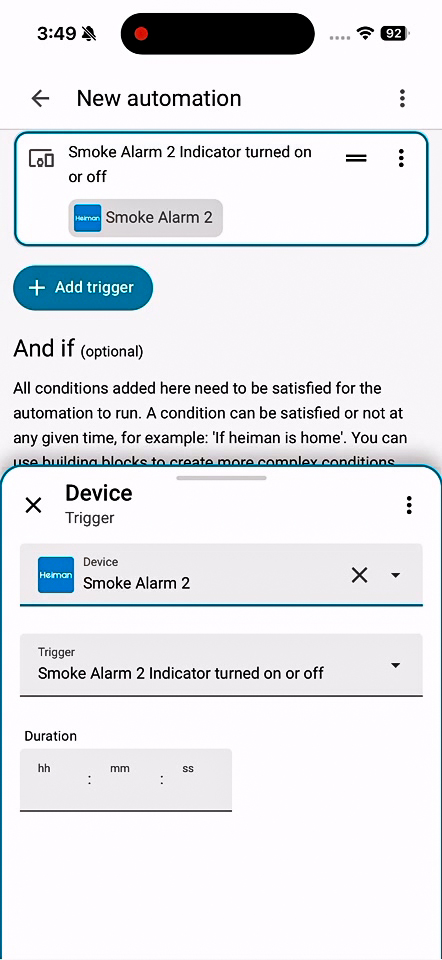
Step 4: Add an action
- Under the "Then do" section, tap + Add action
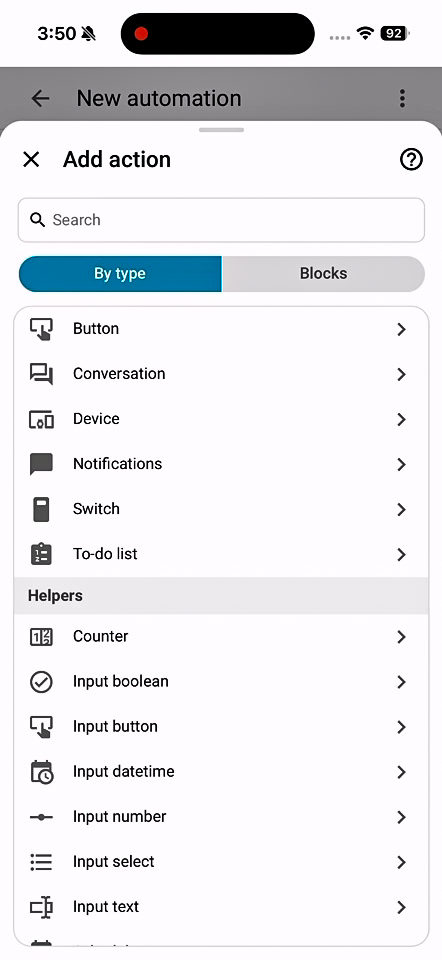
- Select Notifications from the action type list
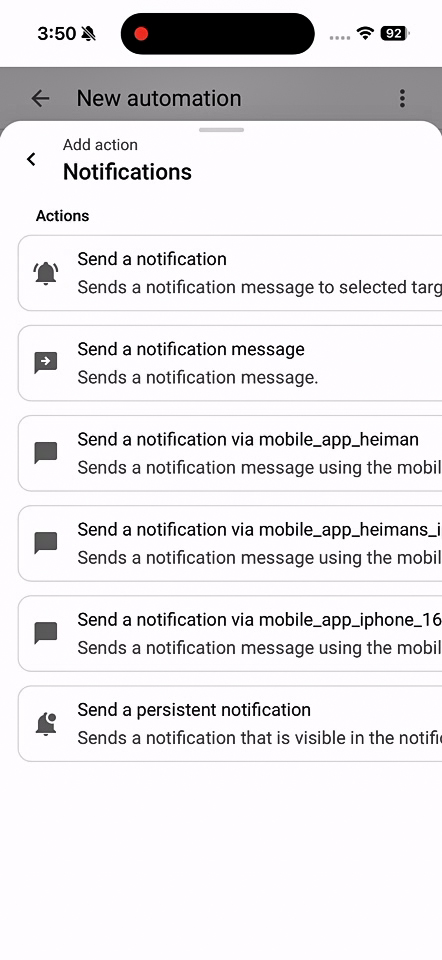
- Choose Send a notification
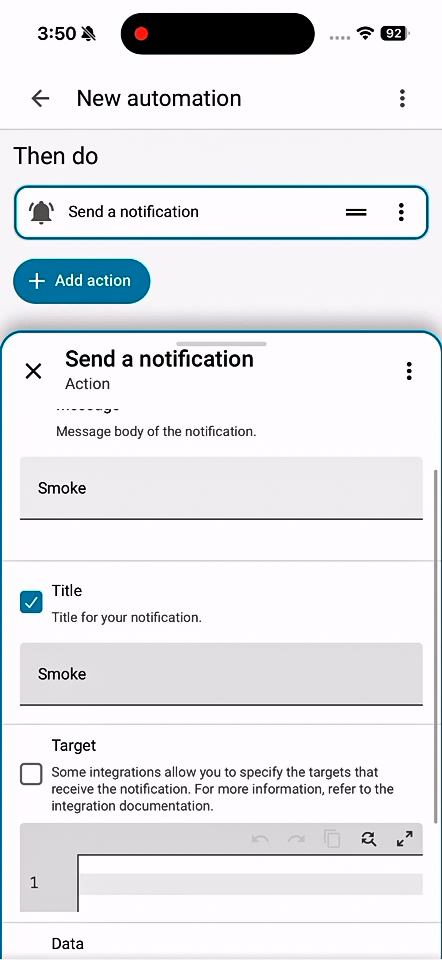
- Fill in the notification details:
- Message: The body text of the notification (e.g., "Smoke detected! Check your home immediately.")
- Title: The notification title (e.g., "⚠️ Smoke Alarm Triggered")
- Optional: You can also select specific target devices if you have multiple phones set up
Step 5: Save and name your automation
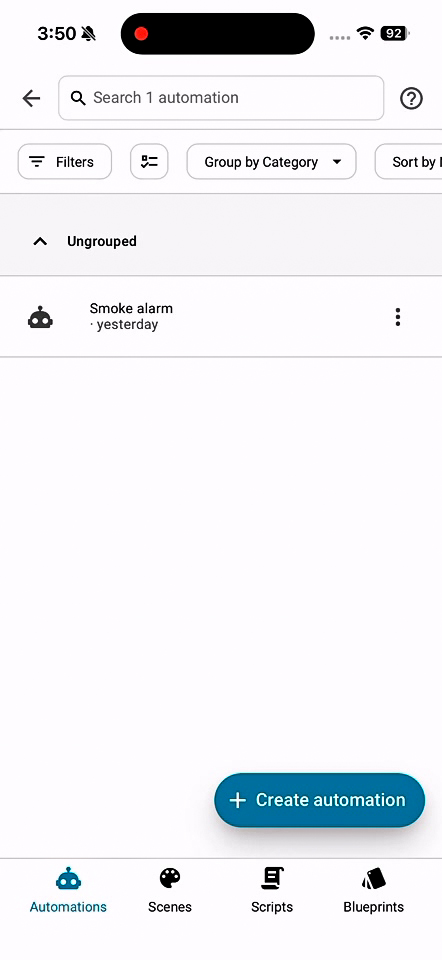
- Tap Save in the top-right corner
- Give your automation a descriptive name (e.g., "Smoke Alarm Alert - Living Room")
- Tap Save again to confirm
Pro tip: We recommend creating separate automations for each smoke detector in different rooms, so you know exactly where the smoke is coming from when you get the alert.
What can you do with it?
- View real-time smoke detector status on your dashboard
- Create custom automations for device events
- Monitor battery levels and receive low-battery alerts
- Integrate with lights, locks, speakers, and other smart devices
- Build complex multi-condition automations using the HA automation editor
We're really excited to bring better support to our existing hardware alongside our newer Matter/Thread products. If you run into any issues or have feature requests, let me know in the comments!
Note: Smart home integrations are intended to provide supplemental notifications only and must never replace the primary audible alarm functions of the device.